
Today I am publicly posting the full pattern and tutorial for the Tohoku Tote. I have chosen to do this for a few reasons.
1) Kari from UCreate asked if it could be used for her monthly “Create With Me” and Kari rocks. I’m thrilled about this.
2) I think we raised what we could sell it for charity. It was “purchased” by over 400 people. Thank you SO much to those of you who donated to the cause. Please don’t feel unhappy that everyone gets the pattern now. I tried to wait a while and you can know that your donation made a difference.
3) The “private” tutorial has been posted on Pinterest and pinned hundreds and hundreds of times. They didn’t have the actual pattern pieces, but the full tutorial was still out there.
So, anyhow….here’s the full pattern and tutorial.
I have tried to be extremely thorough in this tutorial for those of you who are new to sewing. If you are a pro, then you’ll be able to skip some of it. Either way, pretty soon you’ll be toting around a new bag that you’ll be proud of. Let’s get started!
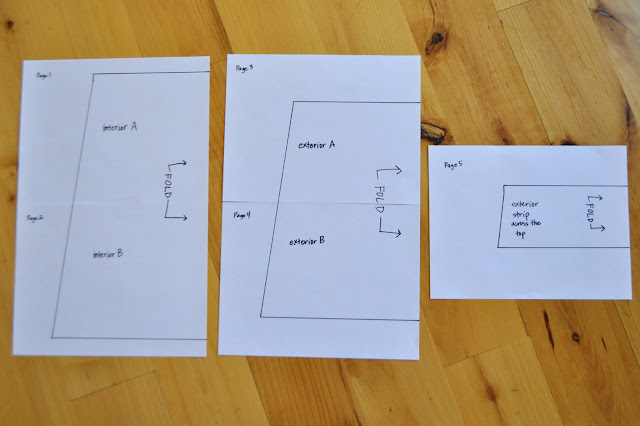
Print off the PDF pattern pieces and tape them together.. (Be sure to print them at 100%, be sure your printer is set to print borderless, and be sure you’ve chosen 8.5×11 paper size on your printer options. This is absolutely necessary or they will not print correctly.)
The pages should not overlap at all. They should be joined page to page like the picture below.
Double Checking Your Printing: If your pages don’t match up as shown your printer probably printed it with a border. To double-check, the length of the interior pattern on the fold should be 15″. The length of the fold on the exterior piece should be 12″.
The length of the fold on the exterior strip shouldn’t vary, but the length across the top of it should be 6 7/8″.
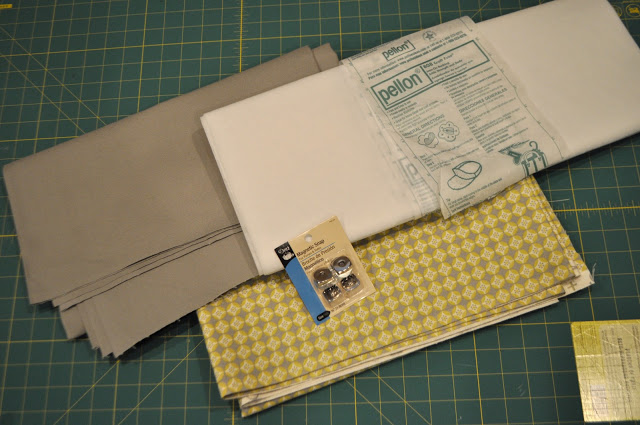
Assemble your supplies. You’ll need the following:
- ½ a yard of fabric for the outer part
- ½ a yard for the inside
- ½ a year for the bow, stripe, and straps
- 2 yards of fusable interfacing
- 1 magnetic snap
- coordinating thread
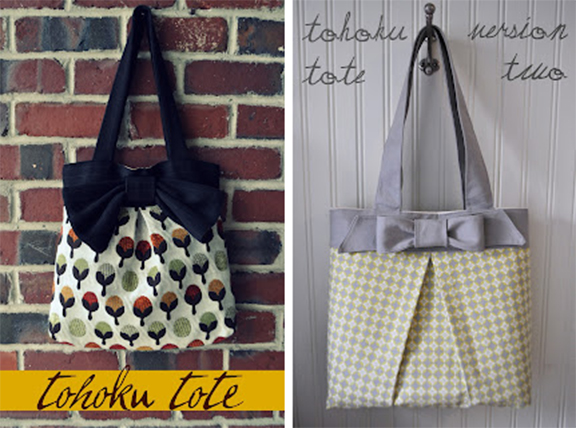
Both of the bags (version 1 and 2) require the same supplies. The only difference is the style of the bow, which we’ll get to later in the tutorial.
If you are new to sewing, you might not know about interfacing. Let’s talk about it. Interfacing is going to give the bag structure so that it isn’t floppy. In my personal opinion, interfacing can make a purse look much more professional and durable.
It will also help hold the weight of the bow on the front without causing the front lip of the purse to sag. I used interfacing on the exterior of the bag as well as the lining.
For the first version I didn’t use interfacing on the exterior acorn print because it was a really thick upholstery fabric, but I still needed it on the brown fabric because it was thin and needed to support the bow.
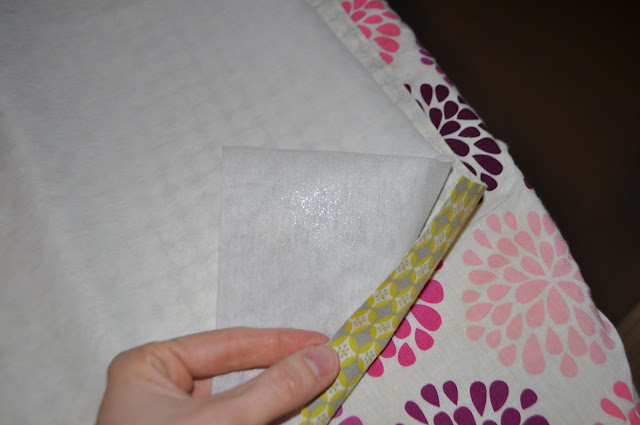
Interfacing is really easy to use, so don’t panic. You can see it in the picture above. It’s the white stuff.
It has a side that’s a little shiny which will adhere to the fabric. They will become one so it won’t be hard to deal with. There are some additional advantages as well. It will make the fabric easy to fold and crease when you need it to.
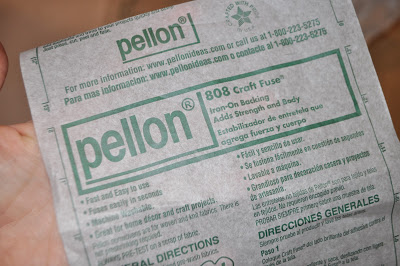
Here’s a close-up of the label. It comes in different thicknesses. Mine is medium. It’s less than $2 a yard at JoAnn’s so it won’t break the bank. (I also recommend getting the metal snaps there because their 2 pack was the same price as 1 at Hobby Lobby.)
You’ll start by cutting the pattern pieces. I like to get the tricky ones out of the way first. The pleated front is the tricky one. If you’re at all intimidated by this you can opt-out of the pleat, but it does make a nice detail. I pleat my fabric first and then cut the pattern piece out.
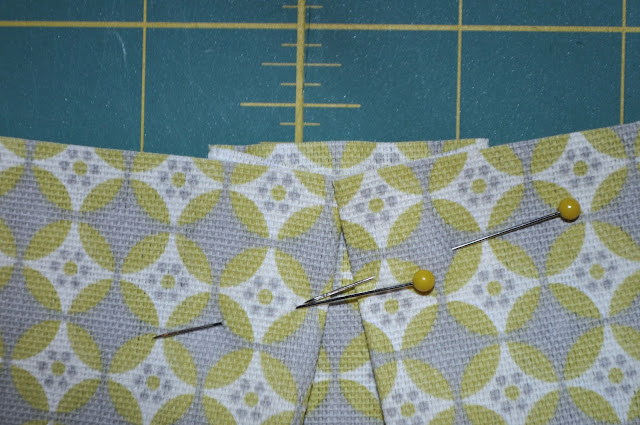
The pleats are about 1 inch and they fold outwards. The fabric in the middle stays straight, but the sides are now angled.
Eventually, you’ll be sewing this piece to the top strip using a ¼ seam, so you’ll want to cut it ¼ inch above where the pleats meet.
The pleats also veer outward so that there is no pleat at all by the time you get to the bottom of the pattern piece.
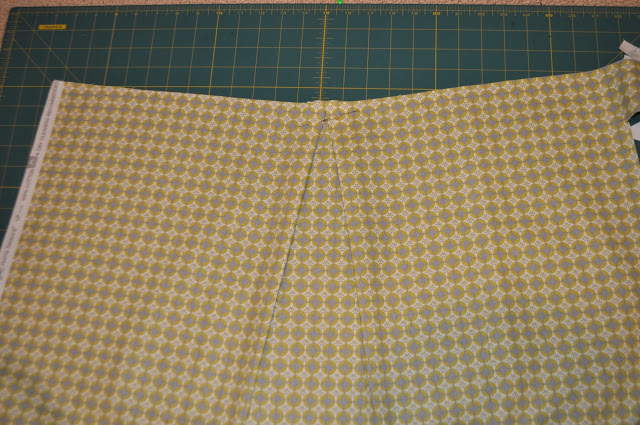
Let’s get one more look at it.
See how by the time you get to the bottom there’s no more pleat? Once the pleats are pinned, lay the pattern over the top and cut it out. (Or to make it a little easier you could cut the plain pattern piece out for the backside of the bag and use that as a pattern for this one.
It’s easier than using the paper pattern and trying to fold the pleated fabric.)
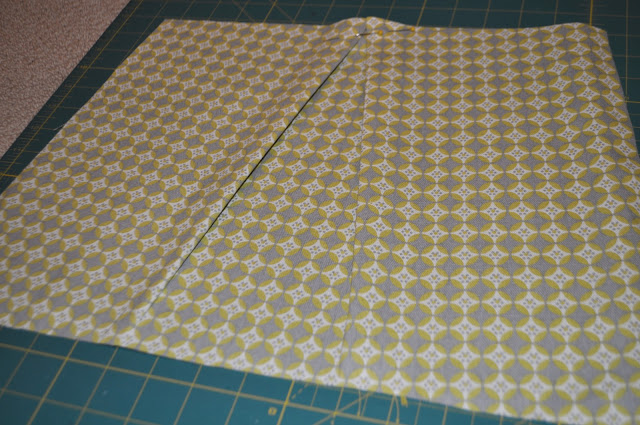
The other pattern piece will be cut out normally. I didn’t bother to pleat the backside since no one will see it. So now you have your front and back and it’s time to add the interfacing.
You’ll have to take out the pins on the pleated front to iron on the interfacing, but if you iron the pleat down first you’ll still be able to see where the pleat goes after the interfacing is added. You’ll just stick the pins right back in afterward.
Place your interfacing on your fabric so that the shiny side is against the wrong side of the fabric and iron it on. I like to iron it decently, then cut the interfacing to match the shape of the fabric and then iron it really well. (That way you won’t iron the interfacing that’s hanging over the edge of the fabric to the ironing board.)
You can see the shiny side in the picture below. It only takes about 7-10 seconds to get the interfacing to stick. Then the fabric will feel super thick. That’s what we want.
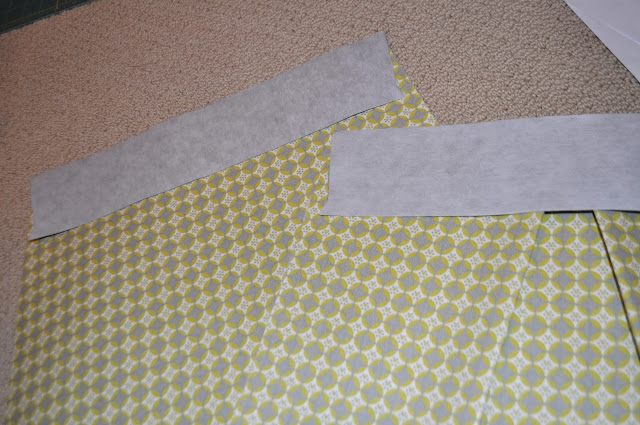
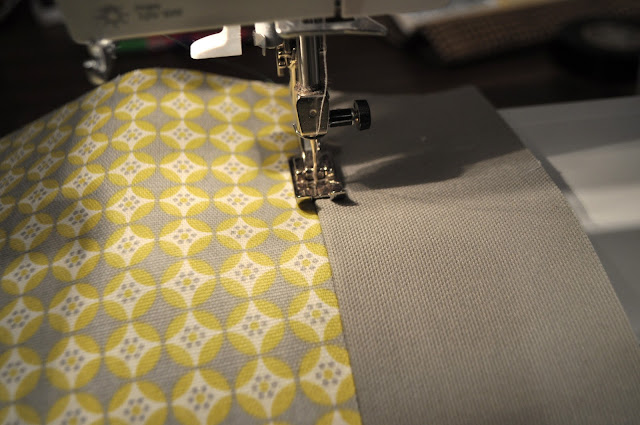
Cut the strips that go across the top of the bag and add your interfacing to them as well. Then you’ll sew the strip to the bag by lining it up like this. Sew them together using a ¼ seam allowance.
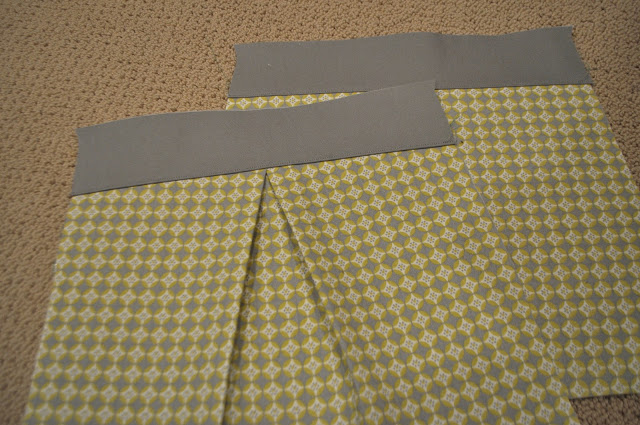
Next, you’ll topstitch across the part you just sewed. I like to fold the seam that’s now underneath upward so that I’m sewing through all the layers when I topstitch. When you’re topstitching you want to get really close to the edge (so it’s about 1/8 away from it at the most).
Now you’re here.
Place the right sides together and sew around the perimeter leaving the top open, of course. Use a ¼ seam allowance.
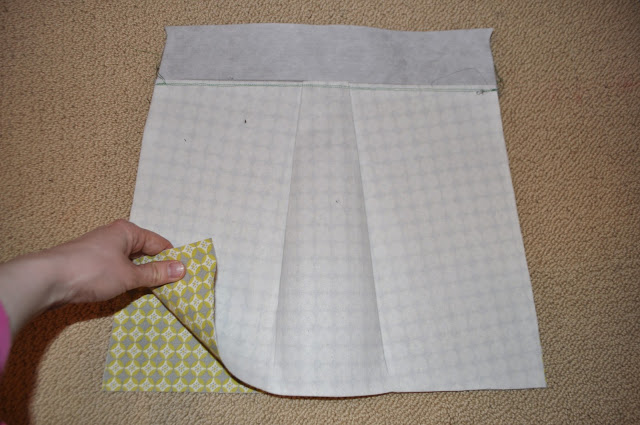
Extra Tip: It’s a good idea to press the seams open. That way when you’re sewing the exterior and interior layers together later you’ll have less bulk and less trouble. If you have a regular ironing board it’s tough to do because the bag won’t fit over it. I just roll up a dish towel, hold it on the inside of the bag, and use the iron on the outside.
I hold the towel so there’s something for the iron to press against. (I didn’t press my seams as you’ll see in these pictures, but I should have.)
Next, we’ll box the corners. I went 2.5 inches up from the corner seam. If you don’t know what that means I will explain it. If you do skip ahead.
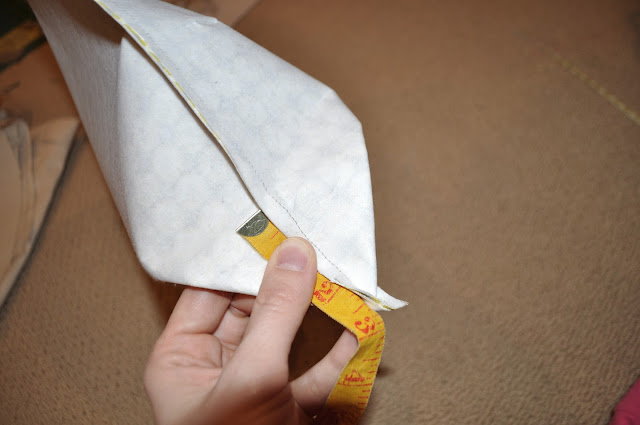
You’re going to take the bottom corner and pinch off the area as shown. You’ll want to feel with your fingers to make sure the seams are aligned. The seam you see in the picture should be right over the top of the one underneath.
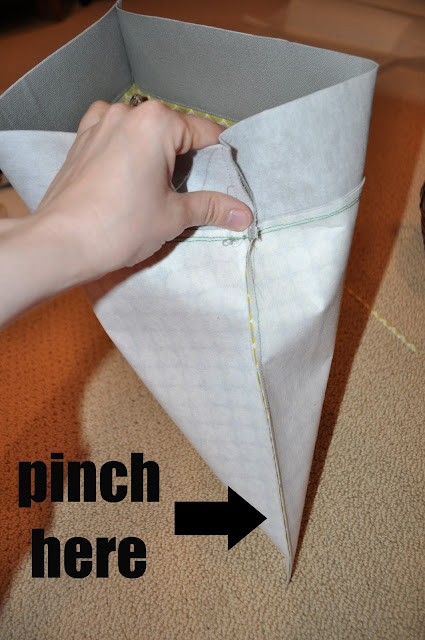
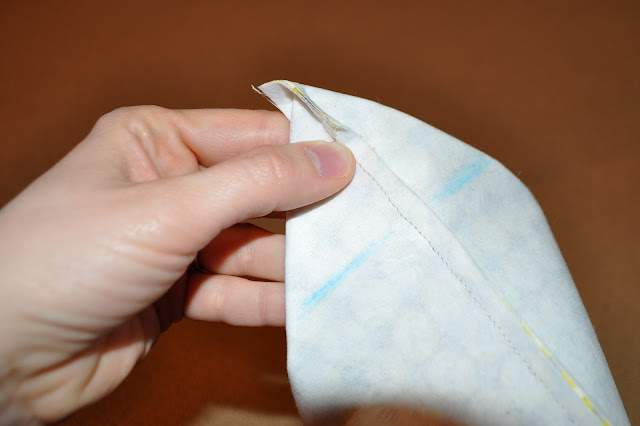
The interfacing makes it easy to crease the pinched area. Now measure up from the corner of the seam. Mark 2.5 inches up from it.
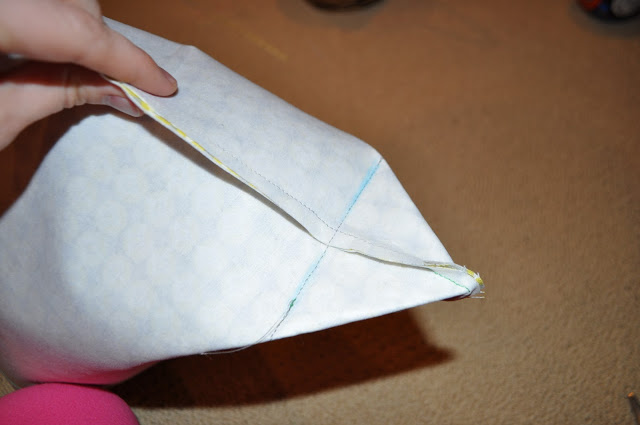
I like to draw a line across where I will sew as a guideline. You can measure up the sides to make sure your line is even.
Sew across the line and cut off the excess. Do this to both corners.
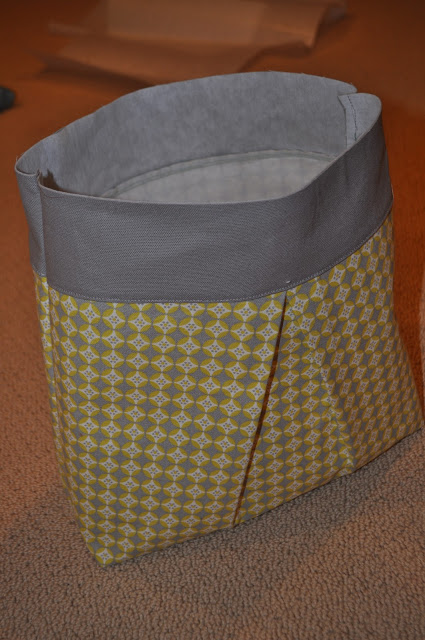
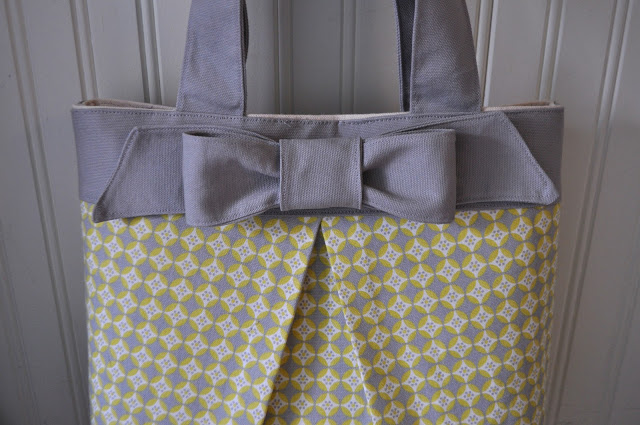
Turn the bag right side out. Now you have the exterior of the purse completed, except for the bow. It should look like this. We’ll make the bow next.
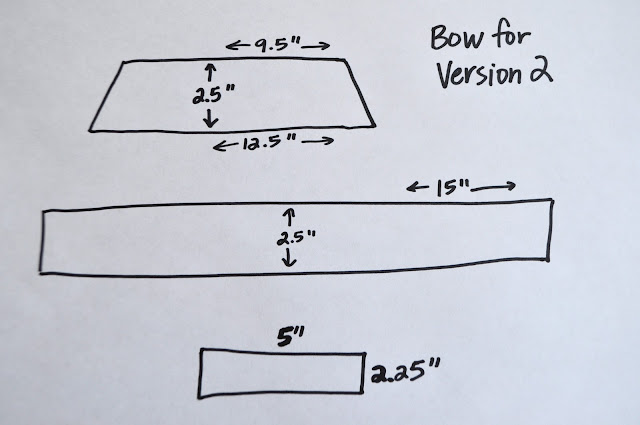
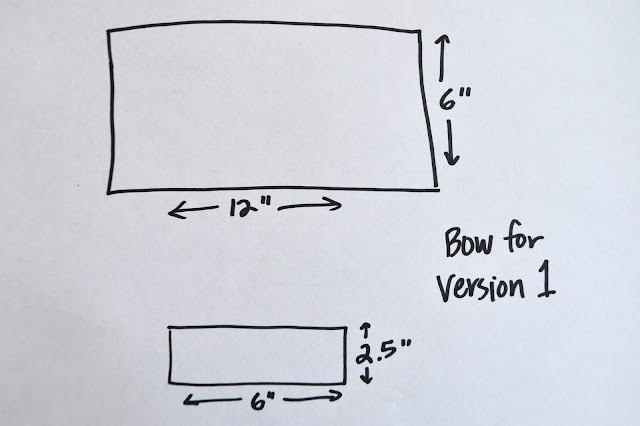
There aren’t any patterns to print out for the bow because it’s all made of simple rectangles that I will give you measurements for.
Here’s the bow from the bag shown in this tutorial. Cut two of each of these shapes. The fabric I worked with was canvas so I didn’t use interfacing for the bow.
If you’re using really thin cotton, I would recommend using your interfacing here as well.
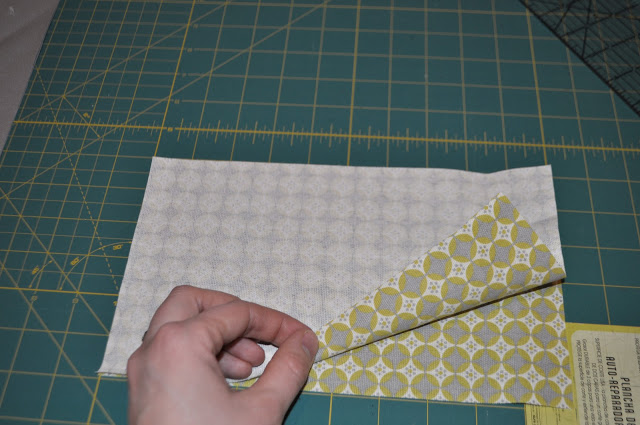
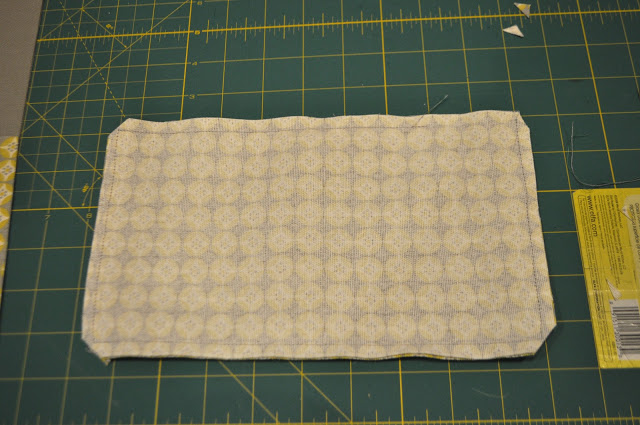
For each piece you’ll place the right sides together, sew around the perimeter with a 1/8 seam allowance and leave a hole to invert it. Trim your corners so they will lay better when inverted.

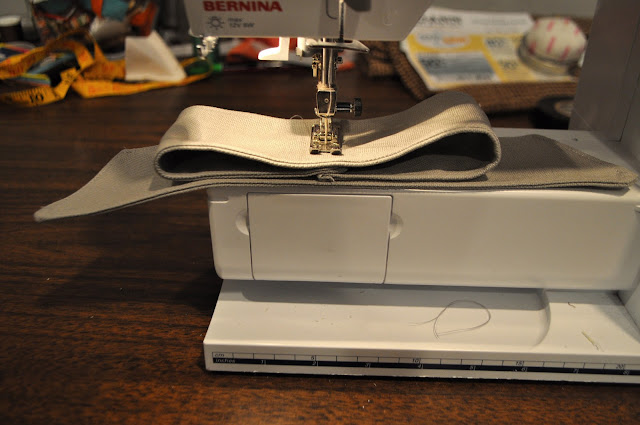
Invert, press, and topstitch. You’ll close up your hole when you topstitch over it. Now take the angled piece and lay it down. Take the large rectangle and create a loop, allowing it to overlap about ¾ inch in the back.
Stack it on the first piece and stitch these layers together right down the middle.
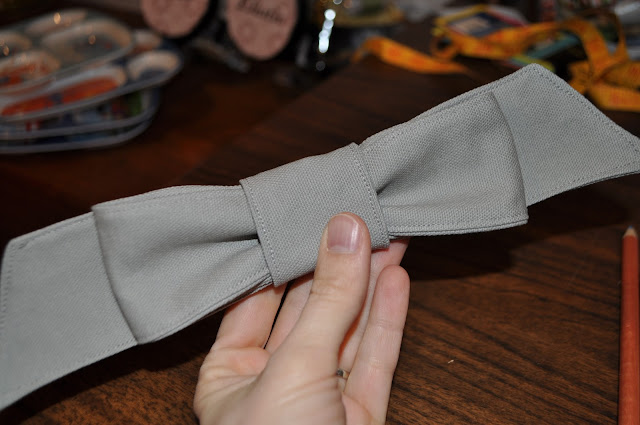
Now take the small rectangle and sew it into a loop, allowing it to overlap about ¾ inch.
This is hard to get under the machine, but as long as you sew it a little on each side it will be fine. You don’t have to sew across the entire loop.
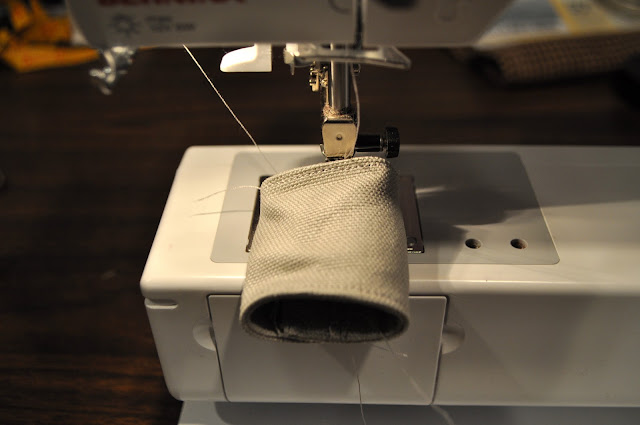
The loop that you’ve created is quite small. Slide it over the other two layers. It will be snug and will cause your bow to gather a bit like this.
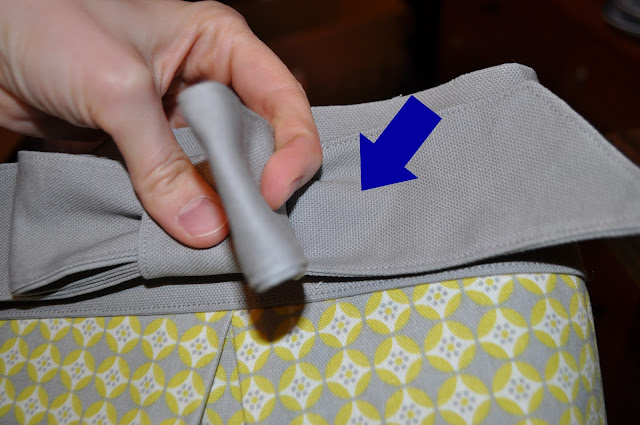
I recommend taking the exterior of your bag and folding it over the top ¼ inch as it will be sewn so you can center the bow on the top strip.
Lift the bow as shown and sew a few stitches right where the arrow is. You can do this with your machine.
I stitched about an inch-long strip there. The bow will completely conceal it. Do this to the other side of the bow as well.
Here are the measurements and pieces for the other bow option. There are only two parts. Cut two of each part. Lay them right sides together, sew around the perimeter with a 1/8 seam allowance, leaving a hole to invert it.
Trim your corners so they will lay better when inverted. Invert, press, and topstitch. You’ll close up your hole when you topstitch over it.
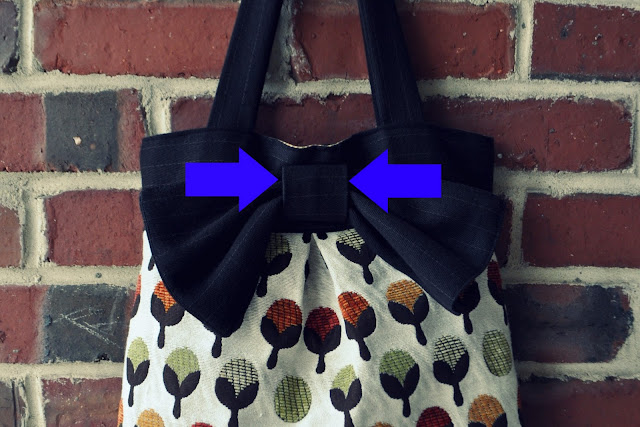
You’ll slide the loop over the long rectangle just like with the other bow. Then you’ll have to do a little maneuvering to get it under your machine and sew a few stitches where the arrow points (but under the loop).
You’re sewing both the underside of the loop and the top of the bow, but it will be concealed by the loop.
The stitches need to be at the very top so the bow won’t droop. If it’s difficult to get it under your machine you can hand sew it on. Do the same thing at the bottom of the loop as well.
Now I like the bow itself to sag the way it does in the picture. I didn’t use interfacing on the bow. If you want your bow to be less droopy you can tack the upper corners of it with a few hand stitches.
Now that the exterior of the bag is totally finished we can move on to the interior. Cut two pattern pieces and iron on your interfacing.
Now you can create all the pockets you want. I’m not going to give measurements for pockets because you can make them the size you prefer, but I’ll show you how to make them.
For this gray purse, I wanted a double pocket. You can easily make a single pocket or multiple pockets. I wanted room for my phone, keys, and chapstick – all my necessities.
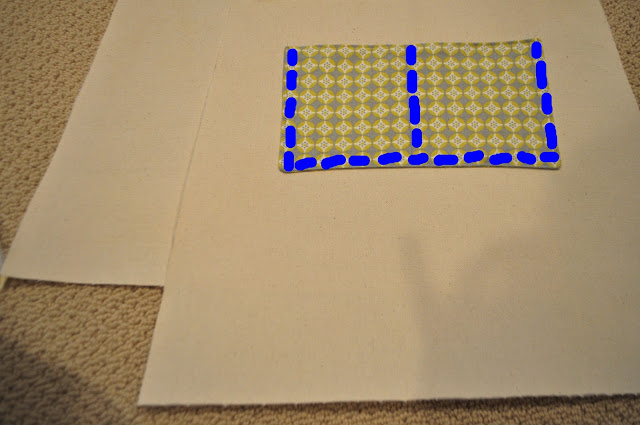
Cut two rectangles. You’ll treat them just like the bow pieces. Lay them right sides together, sew, and clip your corners.
Lay them right sides together, sew, and clip your corners.
Invert, press, and topstitch across the top of the pocket. Then lay it on the interior piece of the purse where you want it. Remember, you need room for the snap and to fold over the top of the bag, so don’t position it too high. Sew it on leaving the top open.
I drew lines where I sewed in this picture so you can see what I mean by a double pocket.
Now lay the two interior pieces right sides together to be sewn. On the interior, I use a little larger seam allowance to create a better fit for the bag.
Instead of ¼ inch like before I do 3/8 inch instead. Press the seams open and box your corners just like you did with the exterior.
Now you can test how the exterior and interior fit together. Fold the top of the interior in a bit so it matches up with the exterior. If the sizing looks right you can continue on. If the interior is a little bit large you can take in the sides a little bit.
Do this in very small amounts. (It is my experience that when the interior feels a tiny bit too big it’s perfect when you sew the layers together.)
We have two more parts to add – the straps and the snap.
To add the snap I take the interior back out so there is less to work with. Find the middle of the bag and make marks where you want the snap to go.
Use an Exacto knife to make small slits for the snap to fit into. The package will contain instructions as well. Follow them.
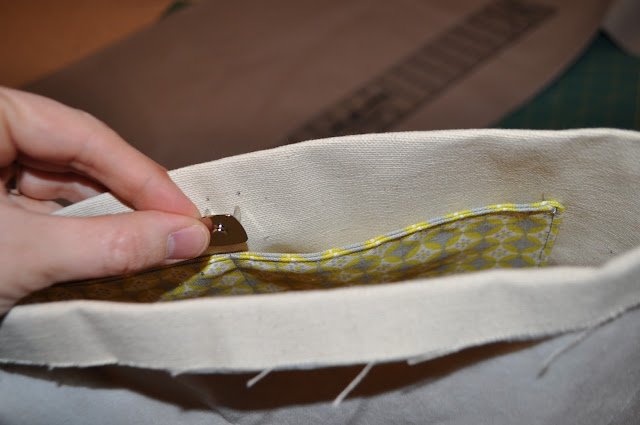
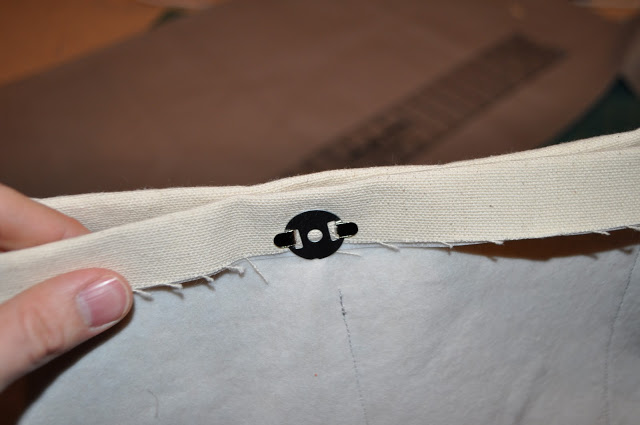
The back is like a brad. You fold the arms outward. Once again, the interfacing is great here because it will give your snap a lot of stability.
Once you have one side of the snap make pencils marks where the other one should go to line up. Insert it the same way you did the other side.
Extra tip: Don’t put your snap too high up on the bag or it will be a little difficult to sew around the top of the bag. (Mine is a little too high in the picture.)
Sew the handles. I like my handles a little longer than some purses. Mine measure 24 inches by 2 inches. Feel free to adjust them to what seems comfortable to you. You’ll cut 4 pieces – 2 for each strap.
Place them right side together and sew only the long sides together using a 1/8 seam allowance. Inverting these can be a battle if you’re using thick fabric. Hang in there.
You could also fold the fabric like double-sided bias tape and sew it that way if you don’t want to invert the handles. (Once again if you want really sturdy handles and your fabric is thin you might want to add interfacing.) Press and topstitch the handles.
Now you can baste them to the bag to make sewing the whole thing together a bit easier. You’ll sew them to the folded part of the exterior (as shown) so that they’ll be in the right place when you fold it in. Pin them and then sew them.
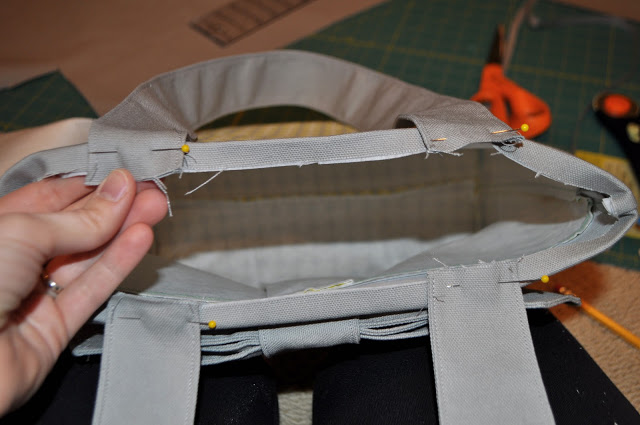
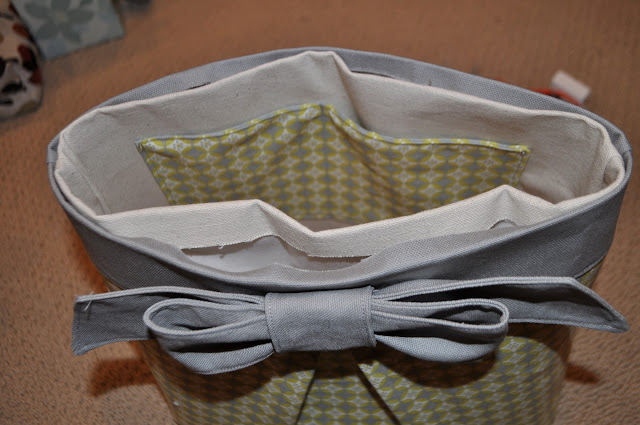
Now it’s time for the finale! Place the interior inside align everything as you want it. (For example, I like my pockets on the back side rather than the front.) Make sure your snap is lined up well for the bag to close correctly. Pin it together and sew around the top.
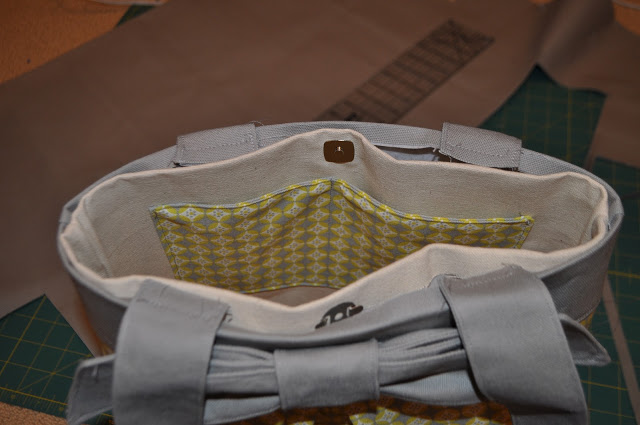
As I mentioned, if you have your seams pressed open there will be less bulk to sew around the top.
If you’ve never sewn a bag like this before you might want to start on the side so that if things don’t match up perfectly at the end it’ll be in a more concealed place and not right in front.
Throw a party! You’re done. Load it up with all your stuff and head out to show it off! Woo-hoo!
If you need visual help, here is the first video in the series of tutorials:
Thank you for reading. See you tomorrow!