Mr. Roar and I are heading to Club Med in Florida today. (You can follow our trip there on Twitter or Facebook.) Today while I’m gone we have an AWESOME guest post. Jess and Monica from East Coast Creative offered to post here for the day. I recently fell in love with their blog. It is packed with gorgeous decor and great ideas. They have a fantastic project to share with you today. Welcome ladies!
___________________________________________________
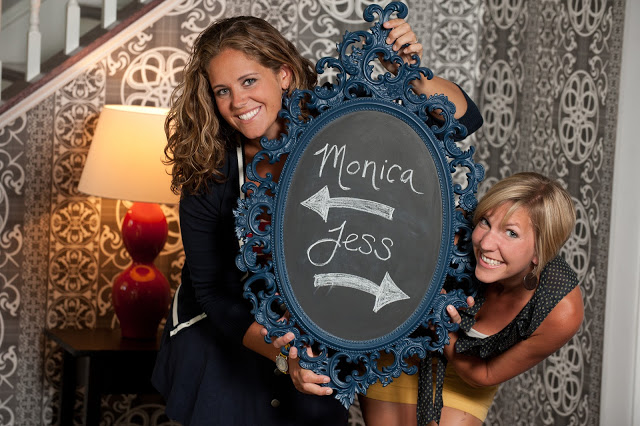
Hey there! It’s Jess from the East Coast Creative, (formerly The Real Housewives of Bucks County). My best friend, Monica, and I specialize in DIY and design, but most of all, we try to keep it real about our successes and failures along the way. We consider ourselves super lucky to be able to blog together and would love it if you would on by for a visit!
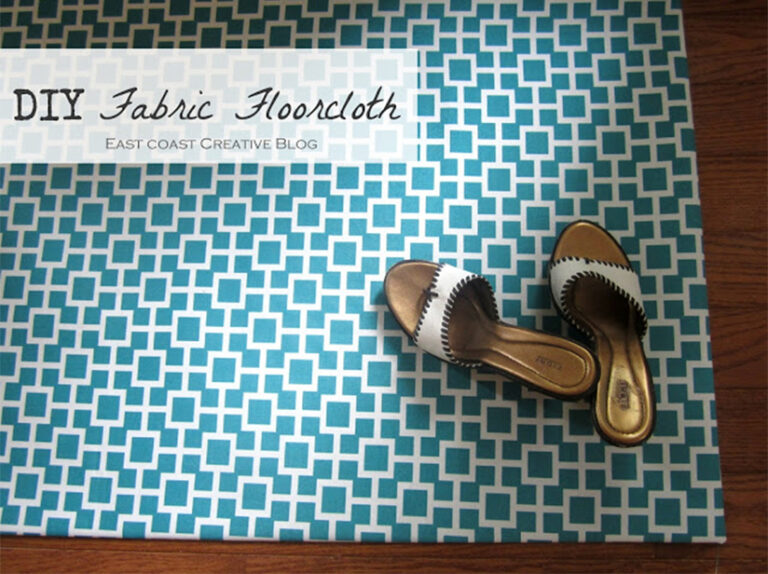
I’m super excited to share this project with you because it opens up a whole world of possibilities for us DIYers who would rather make something custom than buy it at the store. Did you know you can make a floor cloth (basically a floor mat) out of fabric? You totally can. Hallelujah! Plus, it’s so ridiculously easy you’ll want to make one for every room of your house! Let’s get right down to business, shall we?

Step 1: Gather your materials.
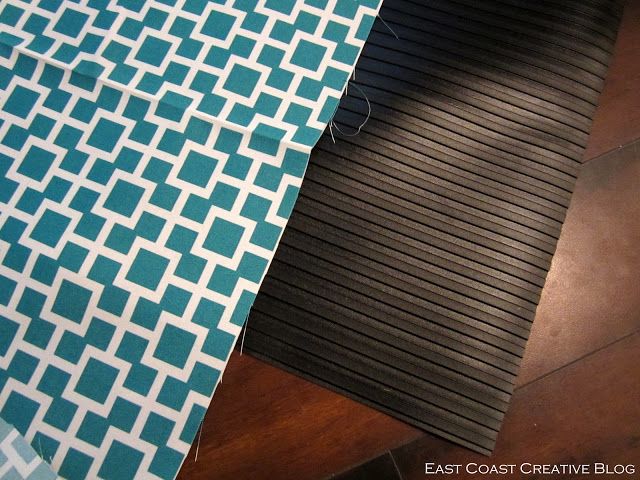
Fabric: the amount depends on the size of your mat. I used about 3/4 yard for my kitchen mat, and
1 1/2 yards for my entryway mat)
Rubber Mat Runner: I’ve seen similar floor mats made with vinyl flooring remnants, but I wanted something sturdy with traction and this fit the bill! Found at Home Depot in the flooring section.
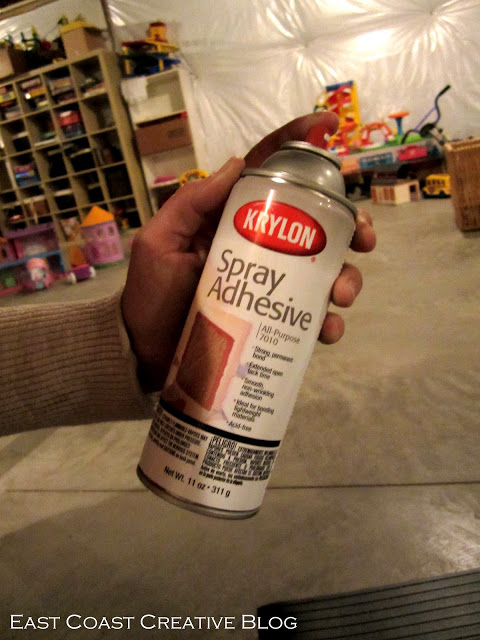
Spray Adhesive
Water-based Polyurethane
Scissors
Duct Tape
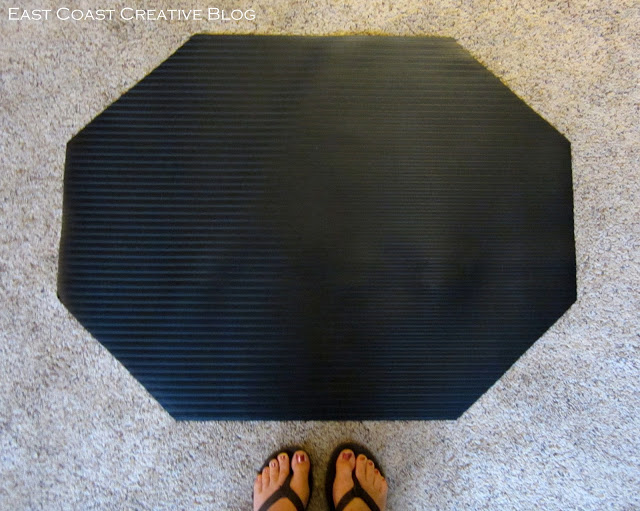
Step 2: Using your scissors, cut your rubber mat to size.
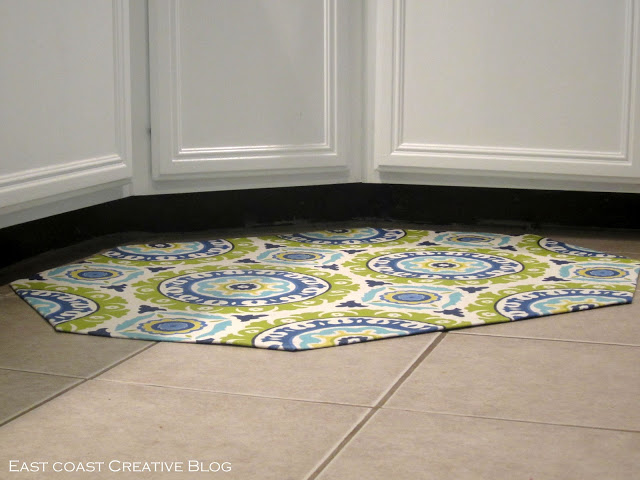
I wanted an octagonal shape for my kitchen so I measured the angles and then cut accordingly.

3. Measure and cut your fabric to size. Leave approximately 2-3 inches all the way around your rubber mat, because you’ll be wrapping the fabric around it later. Don’t forget to iron your fabric before moving to the next step! I used two different fabrics for two different mats. I had extra fabric from the pendant light I made for my kitchen. It’s called Waverly Solar Flair in Lime and Indigo, and it’s fabulous. I can’t remember the name of the other fabric- sorry! But I love.them.to.pieces. (I realize that loving fabric that much is weird, but I’m ok with that)
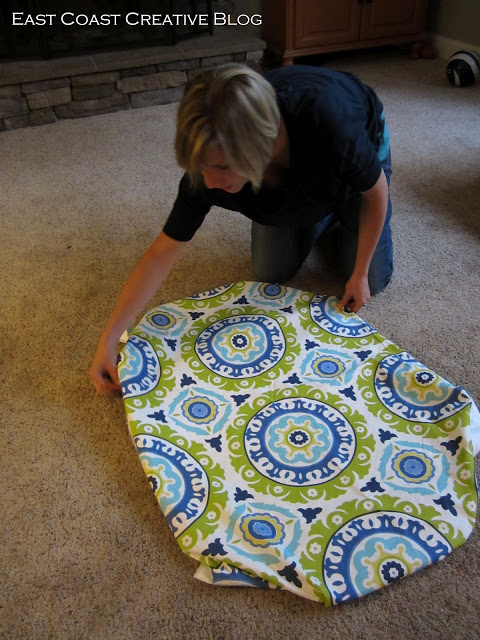
4. Determine your fabric placement. Then fold the fabric back about halfway and spray the rubber mat with spray adhesive. Fold the fabric back down, smoothing out the bubbles and wrinkles as you go. Lift the other side of fabric up and repeat that method. The fabric should stick well to the rubber mat.
Don’t mind me…just loving on my fabric while smoothing out the wrinkles.
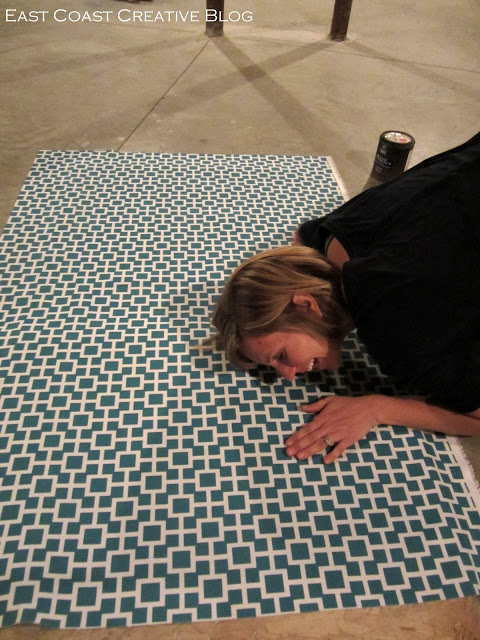
5. Brush a water-based polyurethane on to your fabric. Make sure it’s water-based so that your fabric doesn’t yellow! This will seal your fabric and protect it from water. You’ll also be able to wipe the mat down should anything spill on it (let’s be honest, I wish I could poly every surface in my house for this reason). I did 3 coats of poly, letting it dry completely in between coats.

6. Once the final coat has dried, lay your mat fabric-side down on the ground. Begin folding the edges of the fabric towards the center of the rubber mat. Spray each edge with adhesive and press down until it sticks. Then take your duct tape and run it along the edges to create a seal. No one will see the underside of your mat and you’ll want the extra security the duct table provides!
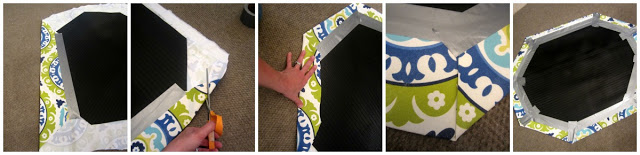
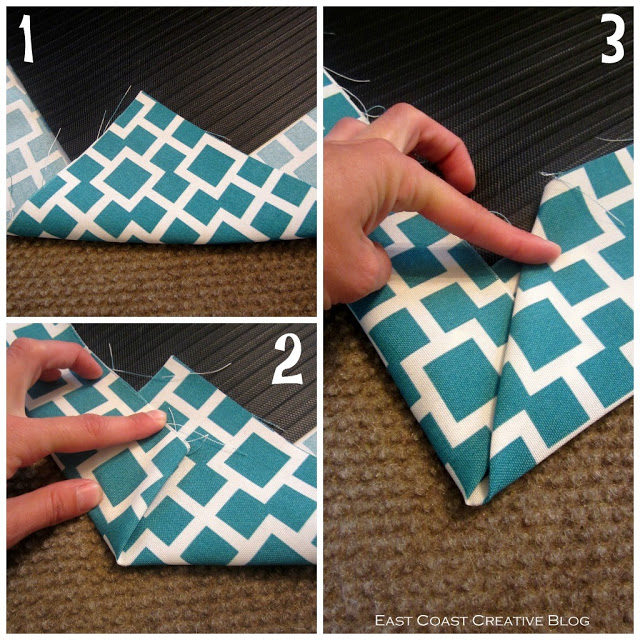
To create perfect corners, just follow these simple steps:
1. Grab the corner and fold up towards the center of the mat.
2. Fold one side up flush against the edge of the rubber mat to create a straight line.
3. Fold the opposite side up in the same way until both sides meet in the middle.
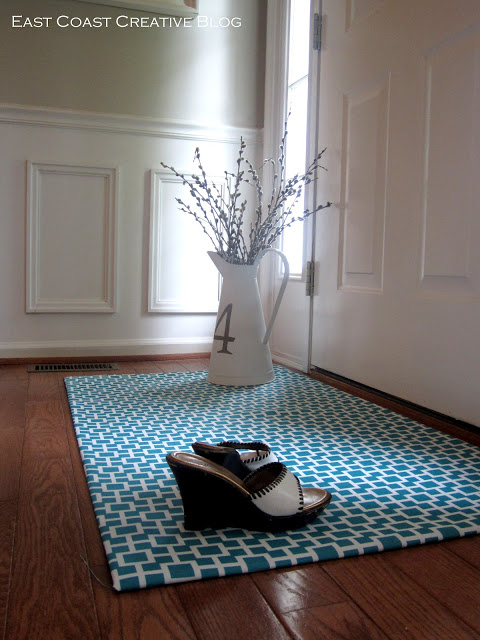
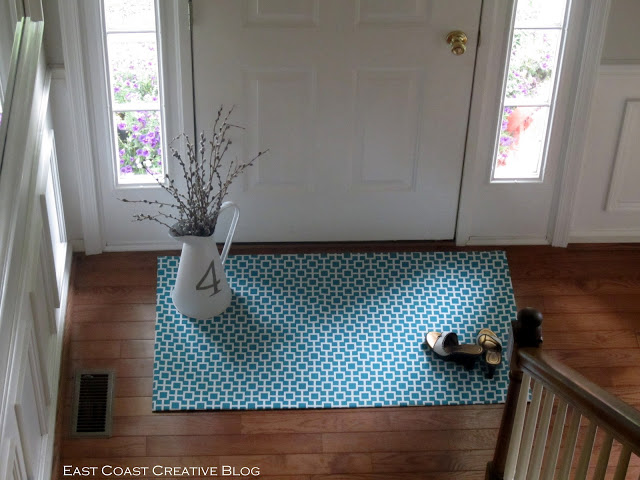
Once you’ve finished duct taping, you’re done! Lay your floor cloth down and admire your handiwork. So easy, and so cute! Here’s the one I made for the entryway (It’s 4 feet by 2 feet, if you were wondering):
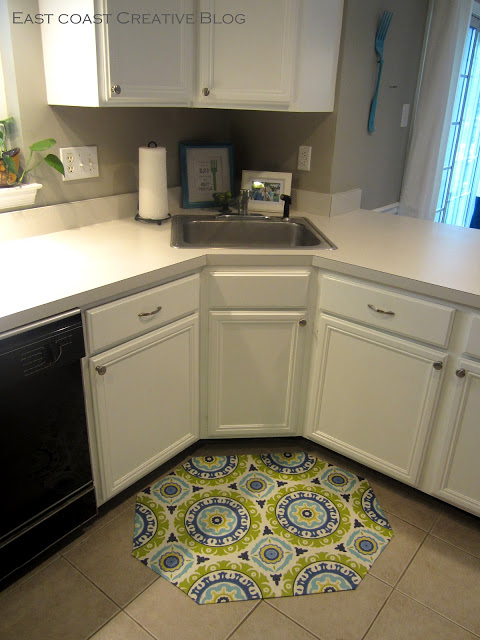
And the one for my kitchen:
Because this mat already has traction, it doesn’t slide around really at all. However, if you wanted extra stay-put-ability, just run a line of caulk around the edges where the fabric is, and it will better grip the floor.
We’d love for you to stop on over to visit us at East Coast Creative. Monica, and I are always up to something! Thanks so much for having me, Cheri!