Today’s tutorial comes from last week’s SYTYC entry for the “recycled” theme. I loved this theme and had a hard time narrowing down options. I think refashioning and upcycling are ridiculously fun.
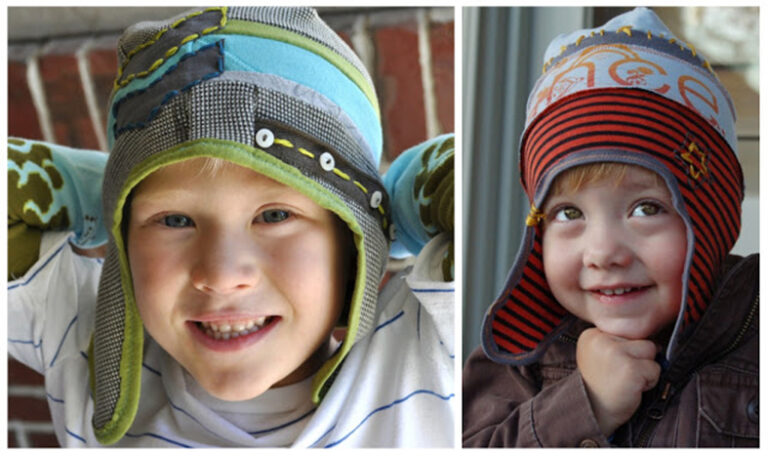
In fact, a little over a year ago I started storing all the old worn-out clothing I had. I love to re-use and transform items in that pile. For this project, I pulled out a bunch of old t-shirts and turned them into boy hats. I have a bit of an obsession with boys in hats.
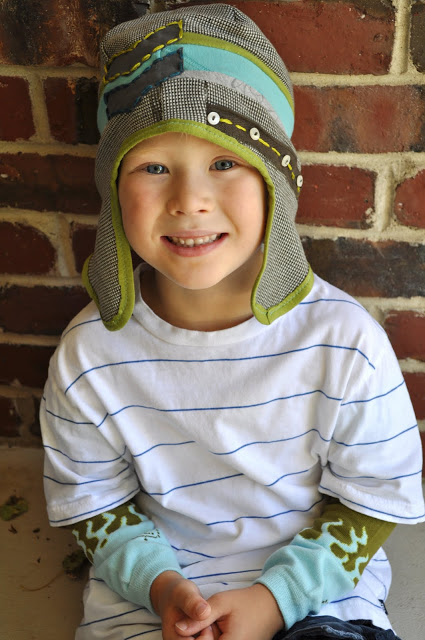
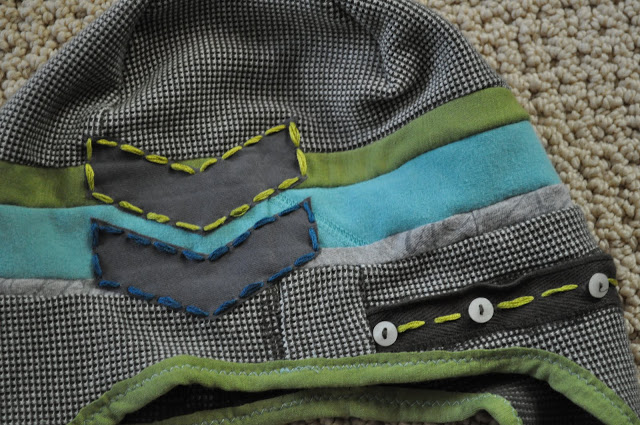
I was able to utilize different parts of the shirts to make the hats more interesting…button strips…
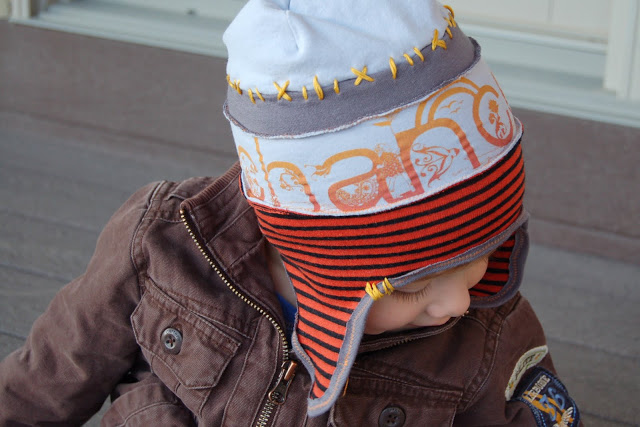
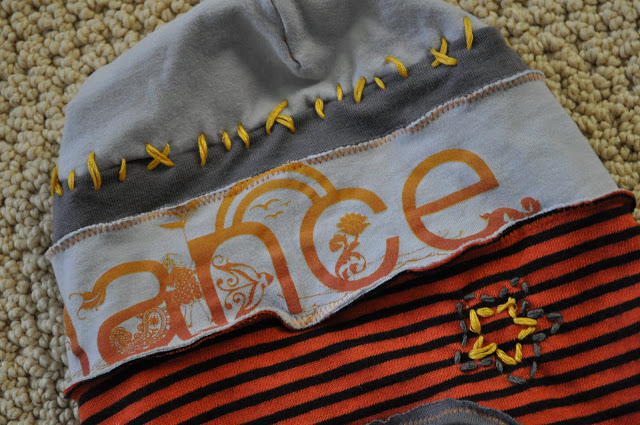
….and already existing graphics from the shirts.
Then I added a little messy-fun-boyish-look with some easy handstitching.
Depending on the t-shirts you use, this could totally be done in a girly way as well. The hats were easy and fun to make. So…let’s get to the how-to.

You can make these hats pretty warm, by using more than one layer on each pattern part or you can make them more autumn-like and thinner with just one layer of fabric on each part. As all of the fabrics are knits, we will use a zigzag stitch every time we sew anywhere. Alright?
Here is a basic drawing that will help you understand the three parts that make up the hat.
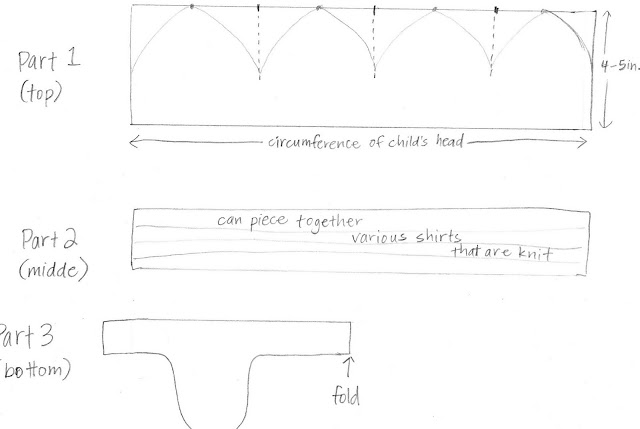
First, start with a rectangle that will become the top of the hat. The width of the rectangle should be the circumference of your child’s head. The smaller hat I made was about 17 inches and fits about a one-year-old. The larger hat was 20 inches and fits a 5-7 year old. Just wrap that measuring tape around his noggin before you start. (My boys happen to have massive heads. I birthed them, so that fact is very apparent and memorable to me.) The height of the rectangle depends on the size hat you’re making. The small one I made was 4 inches tall and the large one was 5 inches.
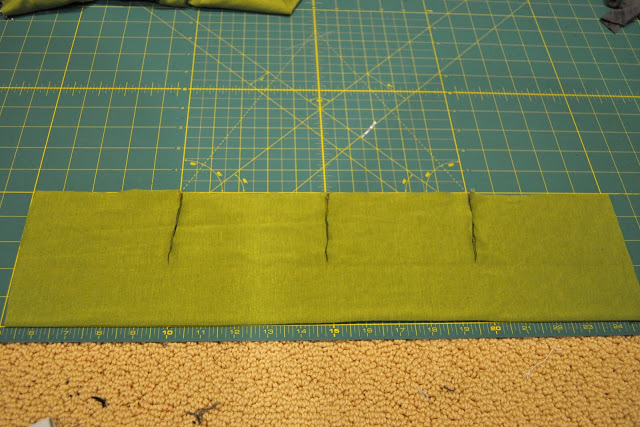
Now that you have your rectangle cut, make marks with a pencil along the top to divide it into fourths. From those marks cut down about 3 inches as shown.
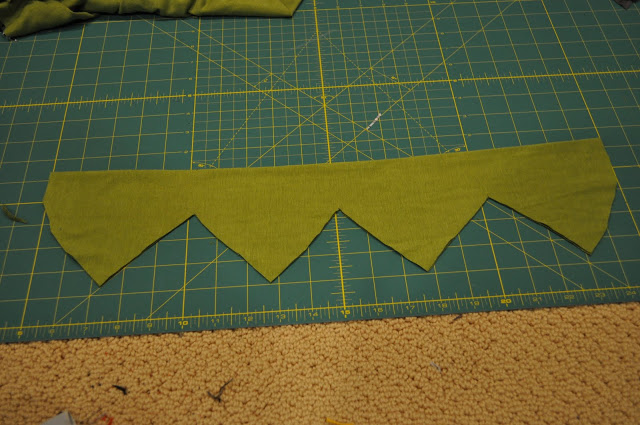
Now mark the middle of those flaps with a pencil and cut curved lines as shown in the drawing above. You’ll make the top look like the top of four footballs. You can see what I mean by looking at the picture below, but the lines should actually be a bit more curved. (This one was my first try that didn’t turn out perfectly.) Now sew the flaps togther to create a dome. Be sure the seams all go on the inside.
Now on to part two. This next rectangle should be the same width as your first rectangle. Height-wise, you have 2-3 inches to play with here. If you want the hat to fit tightly, probably just 2 inches. If you don’t mind it being a bit floppy on top, then you could do 3 inches. Use whatever fabric combos you like. Use as many or as little stripes as you want. You can sew the strips together so that the hem is on the outside of the hat or so that it’s hidden. Whatever floats your boat. I did it both ways.
When the fabric is folded in half lengthwise it will look like part three in the drawing above and the PDF file. The flap is in the middle and the fold of your fabric should be on the right side where the pattern says “front.”
After cutting this out, sew it to part 2 and then sew the ends together creating a closed loop. Then sew that to part 1. Now you’ve finished the basic structure of the hat.

Everything else is about the fun boy embellishing. The first thing I did was to cut long strips of knit fabric about an inch wide and I sewed them on as edging. I did not make this fancy bias tape. I merely folded the fabric over the edge and sewed it with a contrasting color of thread. If it’s not looking perfect – don’t sweat it. You can always trim the edging up once you’ve sewn it on to make it look nice and even. Just make sure you’re sewing through the edging on top and underneath as you get going.
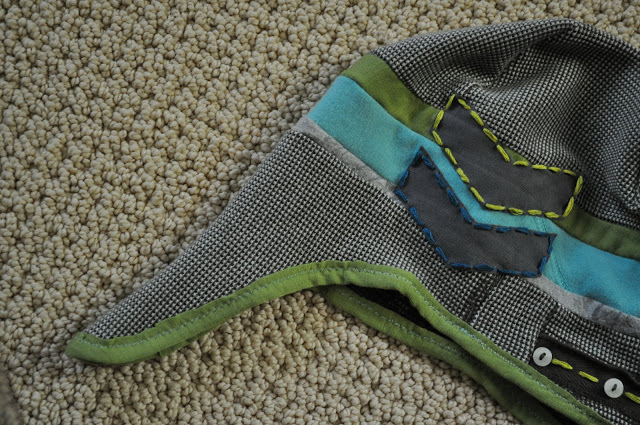
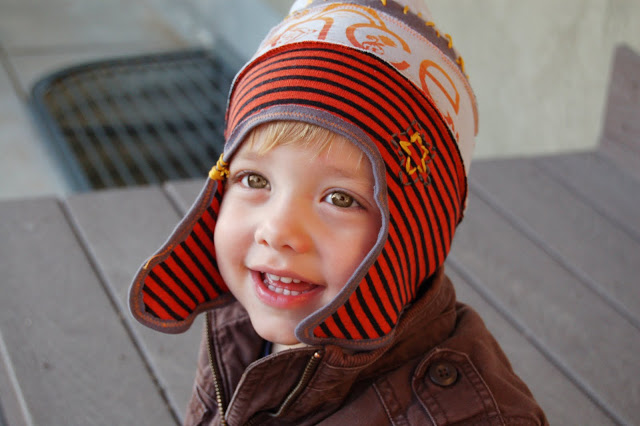
Lastly, I got out my embroidery floss and had some fun. This part is super easy and makes a world of difference. I did some messy stitches over one of the seams and then stitched a star on the smaller hat.
I cut two chevron shapes out and used a fusible adhesive (like heat ‘n bond or wonder under) to attach them to the hat. Then I outlined them with my floss and stitched a little bit by the button strip as well, to keep it together.
That’s it! Woo-hoo! Who doesn’t love a fun boy project? Once you get the hang of it you’ll be whipping them out in no time flat. Bring on the cold weather! You’re ready!