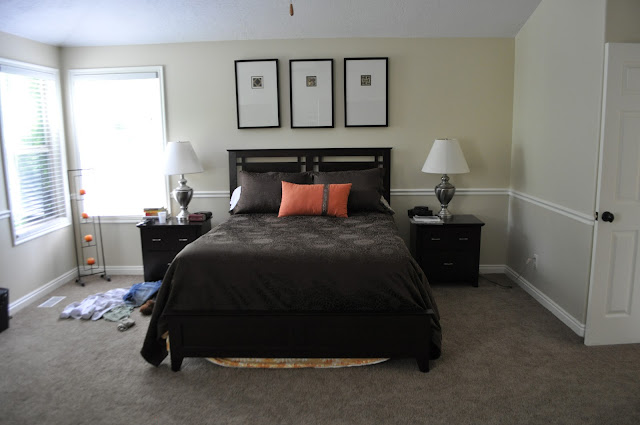
After a couple of months of pulling things together, the Master Bedroom is finally finished! I am so excited to share it with you. If you recall, here’s what it looked like before.
Here was the view to the right.
And here was the view to the left.
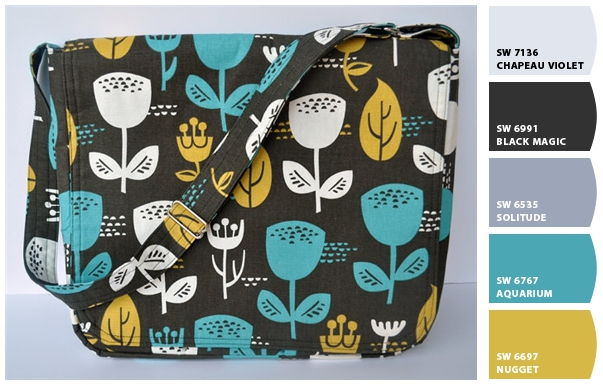
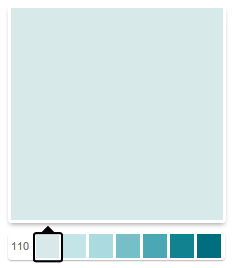
Then, if you recall, I chose this color palette, using Chip It!
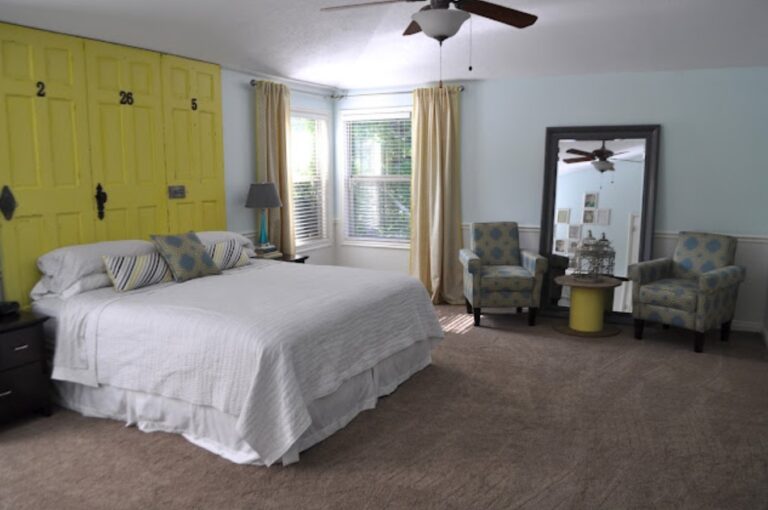
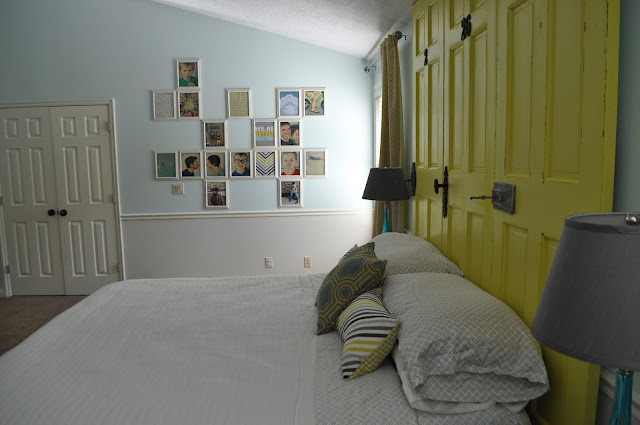
And … here’s the new look. As you enter the room this is the view. We reconfigured the room, placing the bed on a different wall.
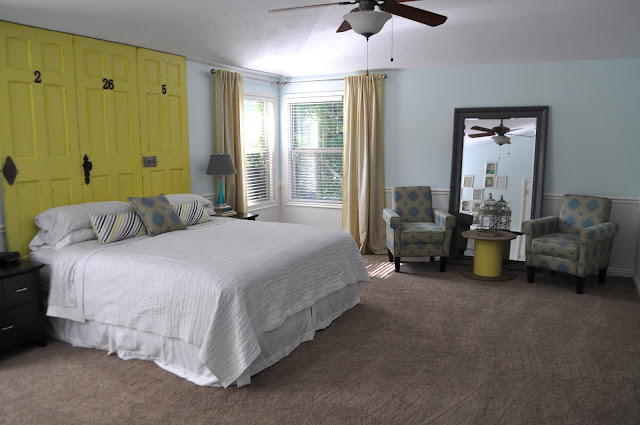
There will be tutorials to follow, but I wanted to let you see the final look all at once. The bed was made from old doors that my sister no longer needed. I had to tweak the color from Nugget to Funky Yellow (by Sherwin-Williams) to match the chairs I found.
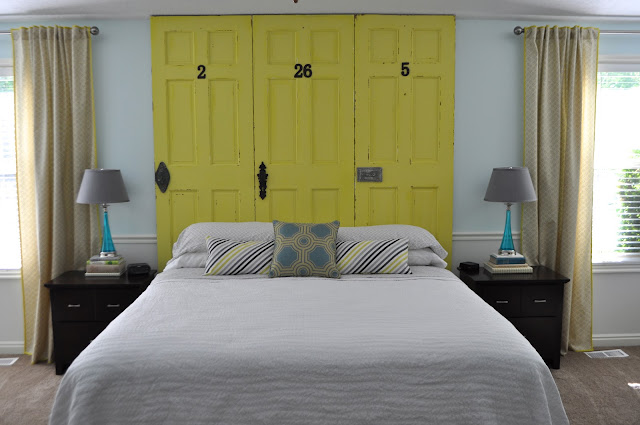
The numbers on the doors are our anniversary. The numbers and knobs were purchased at Hobby Lobby. I like minimal pillows on our bed because if there are a lot of them we’ll never put them on. The main four are pillows we use, the two striped ones were homemade and the middle one was purchased. The white quilt is from Target, as is the bedskirt.
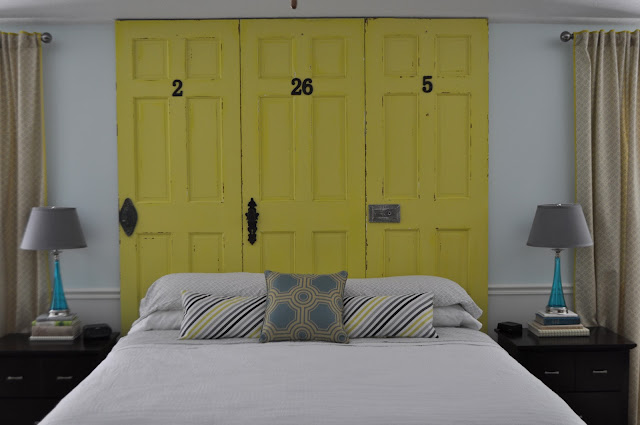
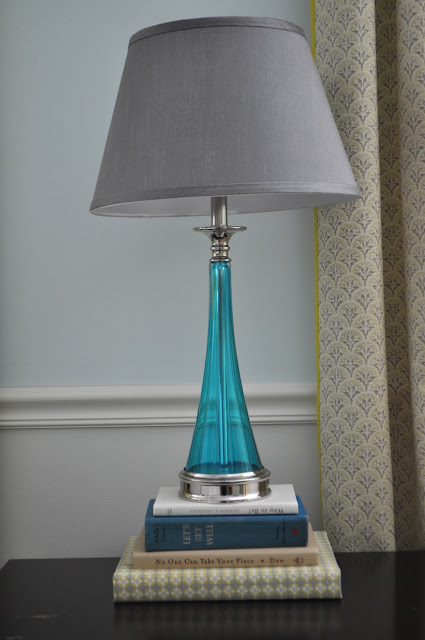
The nightstands are the same ones from before. I purchased new lamps that I let Rex pick out. (I told you he has a great taste for a 5-year-old.) They were a little smaller than I wanted, but I added some of the fabric-covered books I made HERE to give them more height. They match the Aquarium color from the palette really well and the lampshade is in the Solitude color.
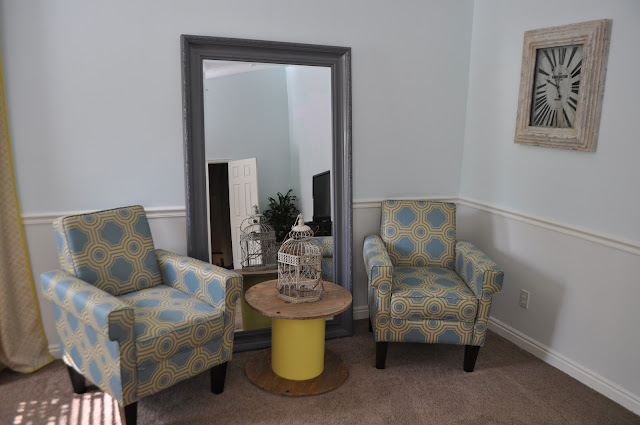
The chairs were my starting-off point. I found them at an Overstock outlet for a killer price. The mirror was on sale at TaiPan trading. It was originally black, but I spray painted it gray.
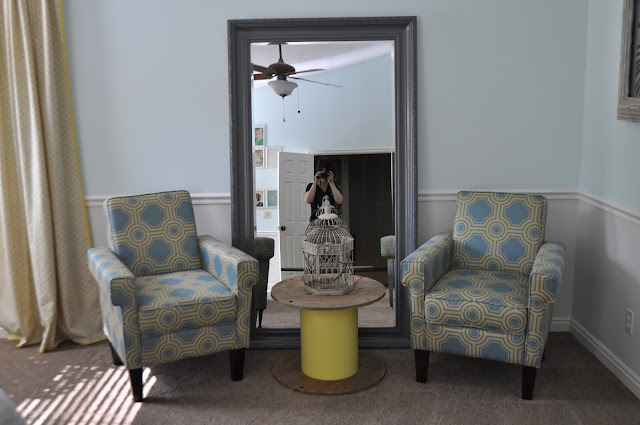
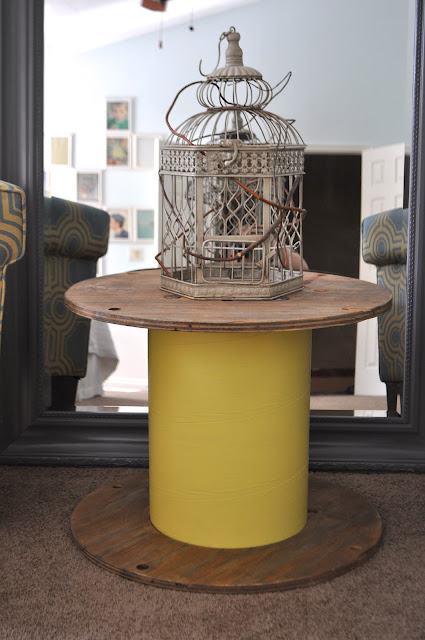
The table is a used wooden spool I got free at a home improvement store when they were done with it. I gave it a little makeover. I love upcycling and I love free.
The clock to the right was also from TaiPan.
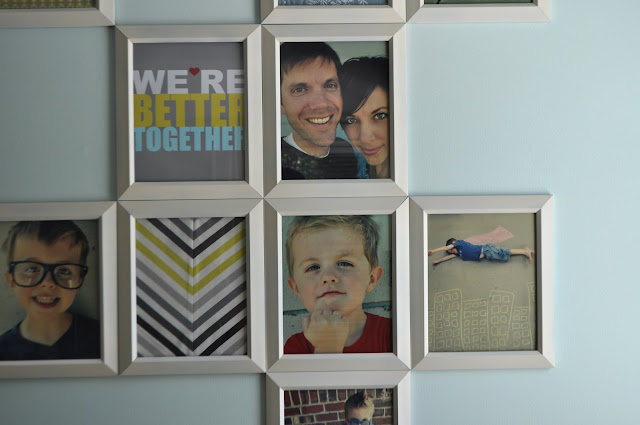
The wall on the other side of the bed has a fun picture collage of our family.
I took pictures and fabric and made some art for the frames. I wanted to hang them in an interesting way, so this is what I came up with.

I also thought it would be funny to have a couple of photos of me and Mr. Roar that lined up.
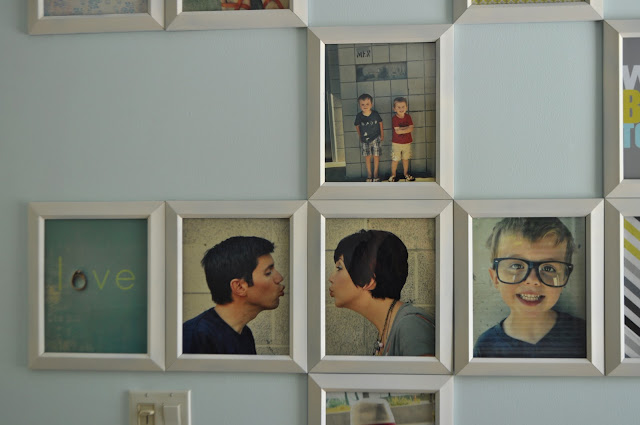
I made the “We’re Better Together” art and printed it as a photo. I cross-processed all the photos at about 40% to give them some continuity.
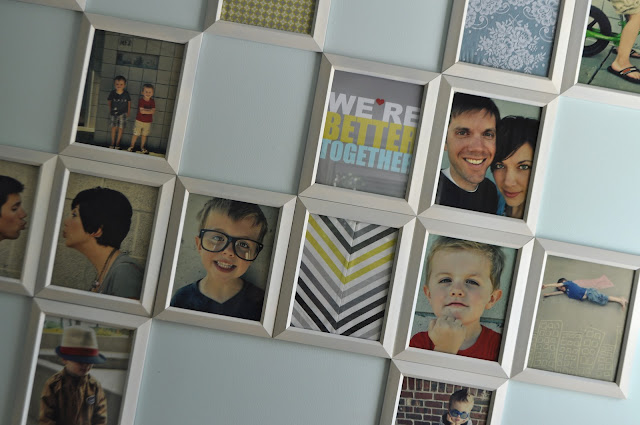
I had to copy the superhero picture idea that I’ve seen floating around Pinterest. It’s so Rex.
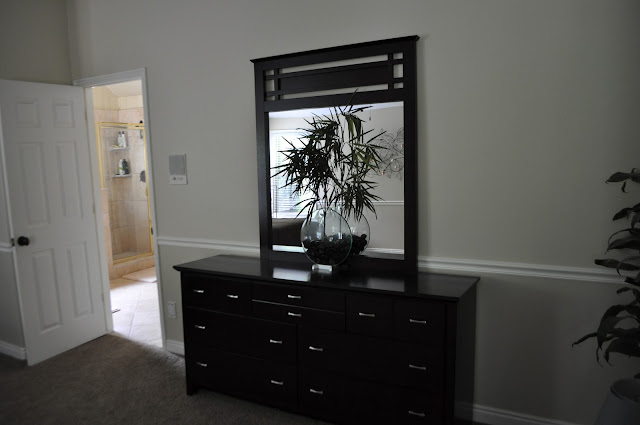
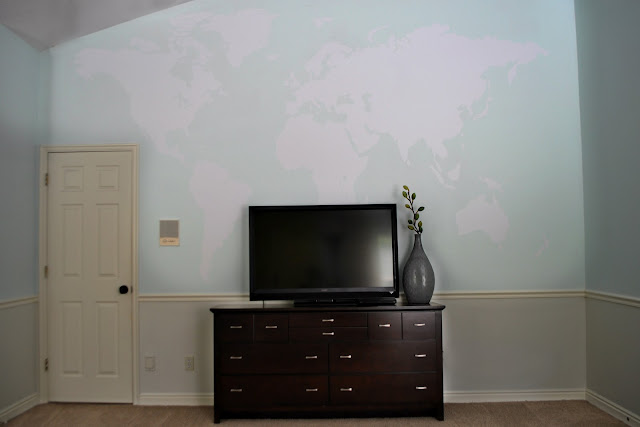
The wall across from the bed has the same dresser it always had, but we took down the mirror and got a TV for father’s day. Above the TV is a vinyl world map from Vinyl Impression (more on that later). It’s extremely hard to photograph this because it’s fairly subtle. I love how it looks in person, but it’s hard to get a good picture of it.
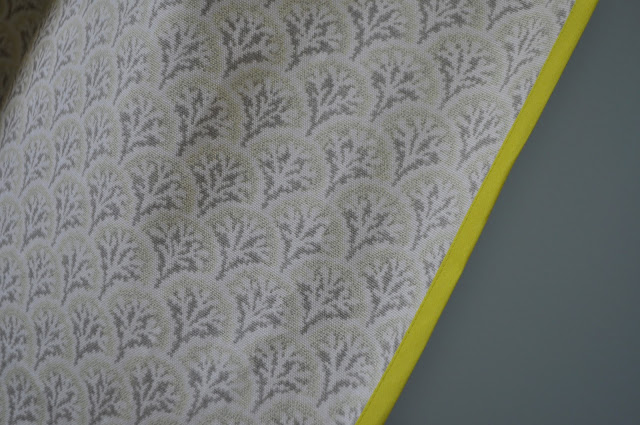
The curtains were handmade.
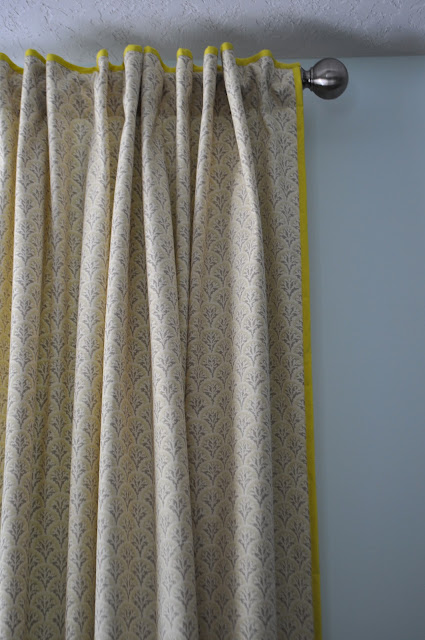
I found this fabric for $3 a yard at Home Goods and I liked the idea of framing each panel with bias tape for a little extra punch of color. (My sweet mom sewed them for me in about 15 minutes. Okay, probably a little longer, but she is crazy fast.)
For the wall color I took Aquarium from Chip It! and chose the palest form from the swatch card, which was Retiring Blue. The wall under the chair-rail is Pure White.
And the room is done! Whenever I finish a room I just want to sit in it all day. I’m currently having my kids bring food up to me so I don’t have to leave the room ever. I’ve been in here for a week now. Okay, I’m kidding. It has, however, made the room a place we spend more time in now. The Chip It! tool made it really fun and easy to pick a color scheme for the room.