
Are you looking for unique baby girl gifts that really stand out? Check out our guide to the best baby gifts in 2024 that are unique. Whether you need to buy a gift for a newborn or an older baby, we have you covered. Having a baby is such a special time and many people want to mark the occasion with a memorable or useful gift. There are also lots of milestones during that first year, and beyond! If you are looking for the perfect unique gift for a little one, you will find plenty of ideas here.
In this article, we will present 20 amazing unique boy and girl gifts with lots of inspiration. We will also look at considerations to make before buying a gift for babies, to help you make the best purchase. If you are still stuck for a choice, check out our best overall pick and best budget pick. You do not have to spend a lot to find an special gift! Finally, we will present some frequently asked questions about baby stuff so you will have everything you need to select the perfect item.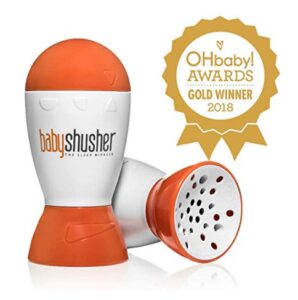
Considerations When Choosing a Unique Baby Gift
For a memorable baby gift, you will want to carefully consider which is the best item for your recipient and the occasion you are marking. Here are a few key factors that we would suggest you think about while deciding on your purchase.
Safety: the number one consideration when buying an item for a baby is safety. Since babies cannot look after themselves, it is essential that any toys or accessories for them are certified safe in line with national and international standards. Any item designed for a baby to interact with should be made from safe materials and be free from choking hazards, at a bare minimum.
Age: looking for a newborn gift or something for an older baby? Whatever the developmental stage or occasion, you will want to choose an age appropriate baby gift. Babies grow and change so quickly and will engage with different toys and items at each developmental milestone.
Gender: whether you need unique baby gifts for girls or for boys, you are sure to find the perfect item in our guide. We have also included gender neutral gifts in our picks. At this young an age, gifts do not need to be specifically targeted at different genders.
Function: are you looking for a toy, a useful item, or a special keepsake? Considering what function you would like the gift to serve is a great way to narrow down the choice available and ensure your gift is well received!
Price: if you are marking a special occasion or buying for someone very close to you, you may be happy to spend a little more to choose a really memorable gift. However, if you do not have much to spend, you will still have lots to choose from in our guide. Deciding how much you are comfortable spending can help to focus your search.
Top Unique Baby Gifts 2024
Questions like where can i find unique toys and gifts will be answered. Now that we have looked at some of the important considerations, we are ready to present our top picks for the best unique gifts in 2024.
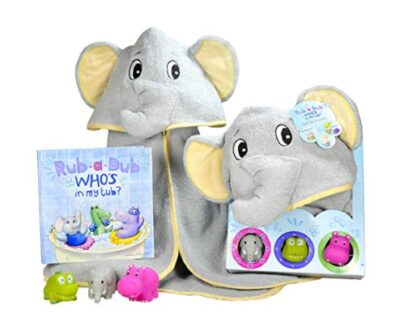
1. Hooded Elephant Towel Gift Set
Bath time with baby is such a special part of any new parent’s day! This five piece bath set would make a perfect unique baby shower gift. The set is themed Rub A Dub, Who’s In My Tub and contains a hooded baby towel, story book, and three fun squirty toys. The adorable hooded towel for baby features a carefully embroidered elephant face complete with a trunk! Parents are sure to love reading the picture book to their baby as they play with the character themed squirty toys. Babies will adore engaging with the hippo, elephant, and alligator squirters as they splash in the tub!

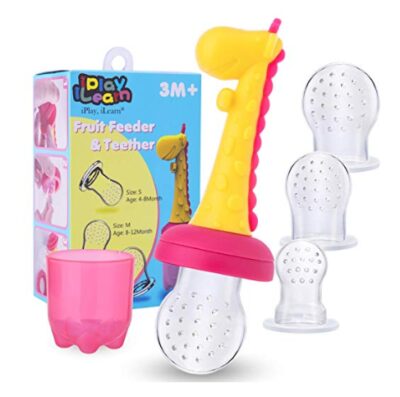
2. Teether and Fruit Feeder
This teether and fruit feeder from Tiny Wonders is sure to make mealtimes with baby even more fun. For young babies, the brightly colored giraffe teether is the perfect size and shape for little hands to explore. When your baby is ready to begin exploring foods, the three sized feeding attachments simply connect to the handle. These innovative feeders are designed to make it easy to give solid food to your baby without worrying about choking. It is easy to clean and sterilize, as each component comes completely apart. This teether and feeder has been tested to ensure safety and is free from BPA, latex, lead, and phthalates.
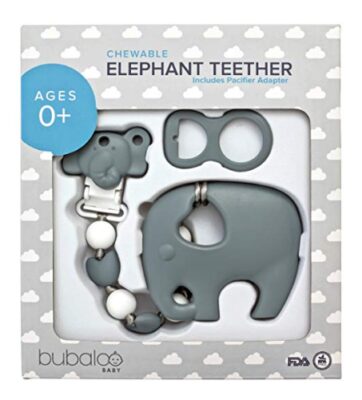
3. Elephant Teether
Looking for trendy baby gifts? Check out this minimalist chewable elephant teether from Bubaloo Baby. It has been designed with safety at the forefront and is made from 100% food grade silicone. Durable but soft enough for babies’ delicate gums, this sleek teether toy is free from BPA, PVC, phthalates, cadmium, lead, and other heavy metals. It comes in a lovely presentation box, making it an ideal gift. The silicone elephant teether is attached to a sweet grey and white beaded clip designed to keep the toy in baby’s reach. The box also contains a universal pacifier adapter so that parents can attach the teether to baby’s favorite soother.
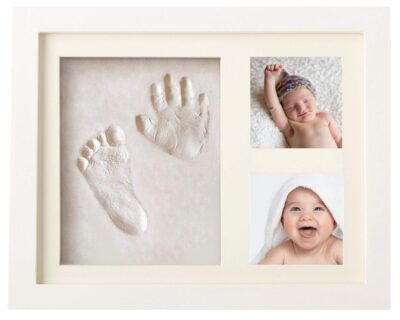
4. Handprint and Footprint Making Kit
One of the most wonderful keepsakes any new parent can create is an imprint of their precious little one’s handprint and footprint. This beautiful set from Bebe Vibes has everything a parent needs to make a clay imprint that will last forever. The decorative gift box contains a hand painted white solid wood frame, sealed white backboard, durable plexi glass, and non toxic soft white clay. Instructions are also included in this kit. As the molding clay is crack resistant, your baby’s precious prints are sure to last for years to come. This is a wonderful keepsake and personalized decor for any family home.
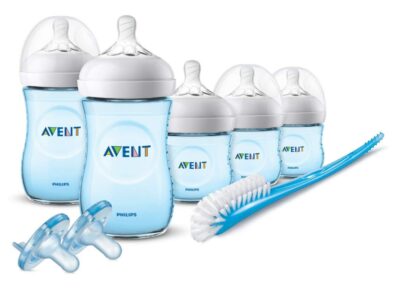
5. Philips Avent Natural Bottle Set
This Philips Avent Natural Bottle Blue Gift Set would make a practical baby shower gift. It is designed as a starter set and contains a variety of bottle and nipple sizes. This gift set features three 4 oz bottles, two 9 oz bottles, two slow flow nipples, three newborn nipples, a bottle brush for easy cleaning, and two Soothie pacifiers. The bottle nipples have Philips Airflex vent technology, which vents air away from the baby’s stomach in order to reduce feeding issues such as colic. This practical set contains everything a bottle feeding parent needs to get started in the first few weeks with their new little one.
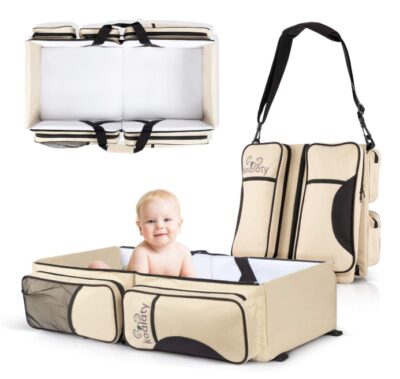
6. Koalaty Infant Travel Tote
Having a baby does not mean your adventures need to stop! If you are a parent who thrives on being on the go, check out this Infant Travel Tote from Koalaty. The innovative 3 in 1 tote is designed for use as a portable bassinet crib, changing station, and diaper bag. The sizable tote opens up to 29 inches by 13 inches by 7.5 inches, so it provides plenty of room for your baby to sleep wherever and whenever they need to. The closed in surface can also be used as a safe diaper changing station or cradle while traveling. The four zippered pockets have plenty of room to store diapers, changes of clothing, and wipes.
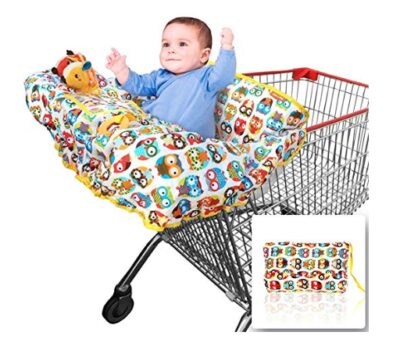
7. Shopping Cart Cover Chair
As any parent knows, a trip to the grocery store with a baby can be a challenging experience. This shopping cart cover from Croc N Frog would be perfect if you are looking for cool baby gifts. It is portable and folds up into a pouch ready for mom or dad to take to the grocery store. Providing a hygienic and comfortable seat and cover for shopping carts and high chairs, this product is made from premium cotton and vinyl in a cute and colorful owl design. The cover also features a smartphone pouch so you can entertain your baby on the go.
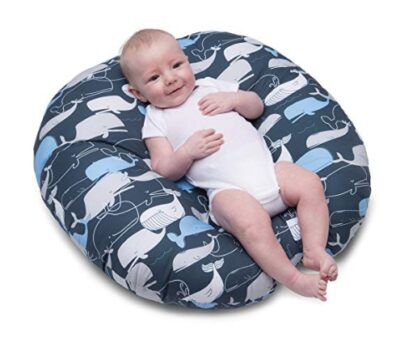
8. Newborn Baby Lounger
This Original Newborn Lounger from Boppy is a classic unisex gift for newborns and infants. Designed to be a comfortable place for little babies to rest, the lounger gives new parents a much needed hands free break! Its unique recessed interior is designed to cradle your baby’s bottom, keeping them safe and comfy. The Boppy Lounger can be wiped clean when needed and machine washed for easy care, which is important as new babies can be messy! This product has won numerous awards and is an extremely popular gift for new parents.
9. Fisher Price Baby Dome
Summer is here and there is no need for your baby to miss out on days in the sun with this baby dome from Fisher Price! This two in one dome provides a safe and shaded spot for playing or napping in. It features a soft and comfortable padded base and a canopy to shade your little one from the sun and pesky bugs. This dome can be used indoors or outdoors, whenever you need to keep baby safe and entertained. They are sure to love the overhead hanging toys, which feature a brightly colored toucan and elephant. The dome has a fold flat design and handles so it is easy to transport and store.

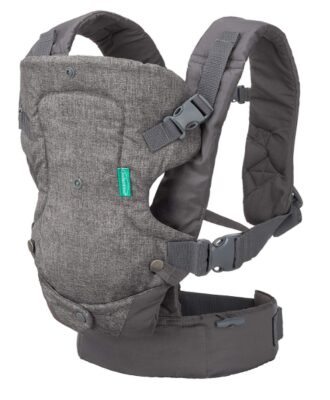
10. Infantino Convertible Carrier
The Infantino Flip is a four in one baby carrier that is designed to grow with your child. It is a buckle on carrier suitable for use from birth thanks to its convertible seat. With no need for extra inserts, parents can simply adjust the base of the carrier to ensure the correct fit and support for their baby’s legs. As your baby gets older, it is easy to adjust the seat to provide a comfortable and supportive hold. The carrier can also be used in facing out and back carrying positions. It features padded shoulder straps and a supportive waist belt to ensure optimum comfort for mom or dad while carrying their little one.
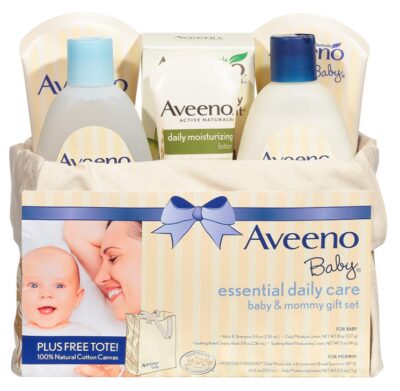
11. Aveeno Baby Essentials
If you are looking for unique baby gift baskets, check out the Aveeno Baby Essential Daily Care gift set. This beautiful basket contains six items for new moms and babies so they can truly pamper themselves! Aveeno is a trusted skincare brand recommended by pediatricians and their products contain no parabens, dyes, steroids, or phthalates. This gift set includes tear free and soap free Baby Wash and Shampoo, Baby Daily Moisture, Soothing Relief Creamy Wash, and Calming Comfort Lotion. Moms are sure to love the Stress Relief Moisturizing Lotion and Stress Relief Body Wash, which contain relaxing essential oils of lavender, chamomile, and ylang ylang.
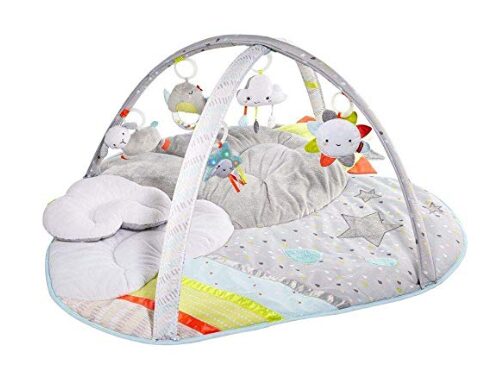
12. Skip Hop Activity Mat
Even little babies love to play while they are awake! With this Silver Lining Cloud Activity Gym from Skip Hop, babies can explore and play in a safe environment. It features a beautiful oversize padded mat to keep your little one comfortable while they play. The fabric is full of different textures for babies to explore, stimulating their sensory development. The overhead hanging activity toys feature interactive elements such as lights, music, crinkle paper, teether, and rattle. Little ones are sure to love batting and grasping for these sweet toys! The beautiful muted color palette with pops of neon is designed to stimulate and engage baby’s sight.
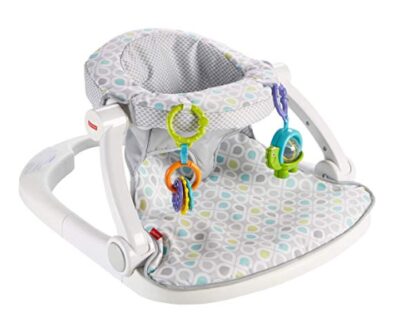
13. Fisher Price Sit Me Up Seat
The Sit Me Up Floor Seat from Fisher Price is a practical item for babies. When little ones are ready to start sitting but still need a little support, this seat means they can interact with family and join in the fun! It features a wide and sturdy base to ensure that little ones are well supported. The comfortable seat pad can be removed and washed in the machine, meaning it is ideal for mealtimes. The floor seat comes with two linkable toys to keep your baby happy and entertained. This clever seat can be folded up easily so it is perfect for traveling or taking on the go.
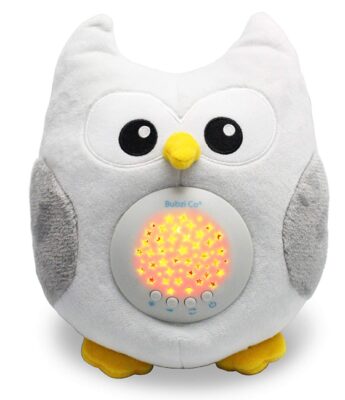
14. Bubzi White Noise Machine and Nightlight
If you are looking for a useful and unique baby gift, this white noise machine and night light from Bubzi Co would be a great choice. It has a cute and snuggly owl design and is designed to help soothe baby to sleep with soft light and calming sounds. Parents can choose from a library of soothing sounds including heartbeats, bird song, and 10 relaxing lullabies. The sounds are set on a 30 minute timer, so parents can simply turn the machine on and let their baby drift off to sleep. The colored lights will engage your baby, projecting gently moving constellations on the wall or ceiling. This product is easy to take on trips, to family homes, or wherever families need to help their babies get to sleep.
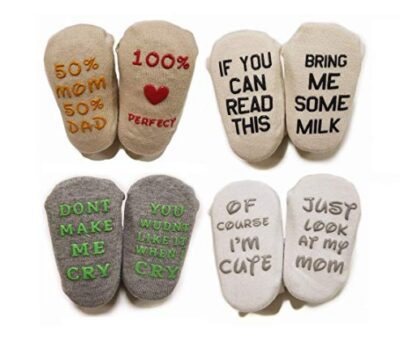
15. Baby Socks Gift Set
For an adorable baby gift, check out this unique set of socks from Twinkletoes. Each sock features an individual quote that is sure to make parents smile! Acting as a non slip aid, the words help older babies to grip as they learn to move around, crawling and cruising. These soft baby socks are made from combed cotton with spandex so that they are easy to stretch over your little one’s tiny feet. The perfect gift for any baby shower or new baby celebration!
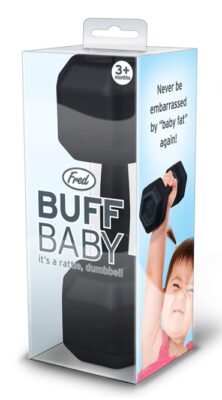
16. Buff Baby Dumbbell Rattle
Rhode Island based brand Fred makes hilarious and adorable accessories for babies and toddlers. This Buff Baby dumbbell rattle would be a fabulous unique new baby gift that is guaranteed to put a smile on new parents’ faces! Babies are sure to love hearing the gentle rattle noise as they explore this simple toy, which supports the development of grasping and reaching skills. This miniature dumbbell weighs just one pound and measures 5.5 inches by 2 inches. It is absolutely baby safe as the materials contain no phosphates or BPA, so you can give this as a gift with confidence.
17. Baby Shusher Sleep Sound Machine
The Baby Shusher is a sleep soother machine that would make a really unique and innovative gift for babies. Using a real human voice, the machine emits a rhythmic and calming shushing noise to soothe little babies to sleep. The sound is designed to remind a baby of the gentle sounds heard from inside the womb before they were born. It is an age old technique that has been approved by doctors and baby experts. The Baby Shusher takes this technique and packages it in a cool and convenient design that makes the thoughtful gift.

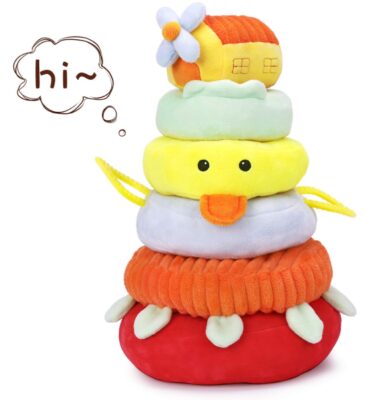
18. iPlay iLearn Plush Stacking Rings
Stacking rings make a really great toy for young babies as they are easy to grip and move and support the development of motor skills. This sweet plush stacking rings from iPlay iLearn are a multisensory toy and would be a lovely and unique baby gift. Made from premium materials, the stacking toy exceeds strict safety regulations such as ASTM F963. The set contains six individual rings: a beeping duck, a windmill rattle, a teether ring, a sunflower rattle, crinkle ring, and white noise ring. Babies will love exploring the various textures and sounds of each ring as well as practicing their motor skills by stacking the rings together.
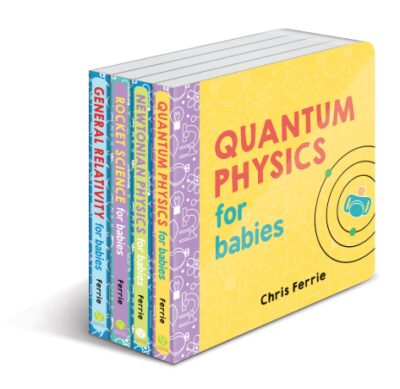
19. Baby University Book Set
If you want to get your little one started with their education early, check out the Baby University book series! Perfect for parents who love science, this set contains four books designed to introduce key scientific concepts to babies using bright pictures and simple words. Within the set, you will find Quantum Physics, Rocket Science, General Relativity, and Newtonian Physics. Parents and babies will love sharing these fun and informative books that introduce scientific ideas such as atoms, forces, black holes, and key theories from Einstein and Newton.
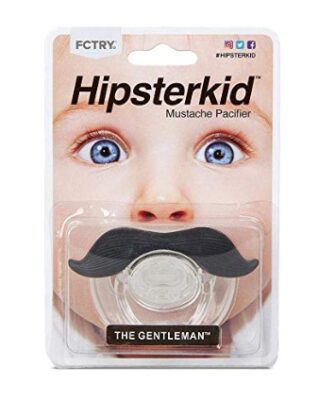
20. Hipsterkid Mustache Pacifier
This Hipsterkid Mustachifier is sure to get a laugh from any parent! Designed to be used from birth, the pacifier features a silicone nipple that is even small enough for little babies. It is functional as well as fun, and it is made from high grade materials that are free from BPA and perfectly safe for baby. The mustache is firmly attached to the soother using dual injection modeling to ensure it will not come apart. This soother would make a unique and hilarious gift for any new parent.
Best Buy Overall
Having presented our selection of top picks for the best unique baby gifts in 2024, we will now share our best overall pick. We have chosen the Aveeno Baby Essential Daily Care gift basket. It would make a wonderful gift because it is packaged beautifully and contains pampering products for both baby and mom. This would be a great way to show mom how special she is and encourage her to have some me-time!
Best Budget Pick
You do not have to spend a lot to buy an impactful new baby or baby shower gift. Our pick for the best budget buy is this elephant teether from Bubaloo Baby. Made from food grade silicone, it is free from BPA and other potentially harmful materials so is safe for baby to chew and explore. It has a cool minimalist design with an attached beaded toy clip and universal pacifier adapter.
What are Unique Baby Shower Gifts?
Baby stuff can be awash with the same baby clothes, diaper cakes, and bottles. For a truly unique baby shower gift, take a look at a memory box that mom and dad can fill with treasured keepsakes. This one has compartments for everything from first booties to first tooth and would make a really special gift for any new parent.

How to Wrap Baby Shower Gifts?
A popular way to wrap gifts is in a basket or bundle style. You may have seen diaper cake style gift bundles, where each ‘layer’ is filled with essentials for new parents and babies. This is an easy yet impactful way to wrap a selection of gifts for a baby party.
Gifts for the Baby Who Has Everything?
If you are buying for the baby who has everything, we recommend a gift that is functional yet funny, like the hipster mustache or dumbbell rattle in our guide. Bring a smile to the parent’s face while giving something that will be useful during the baby’s first year and even beyond. These funky toys are engaging and amusing for parents and babies alike.
Where Can I Buy Personalized Baby Gifts?
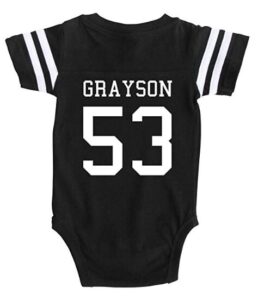
There are many places you can buy personalized gifts. For example, the hand and foot print set in our guide can be used to make a beautiful personalized item to decorate a family home. Another option would be this adorable personalized football baby babygro outfit, which is printed with a name and number. This is a must have gift for any football mad family!
More Gift Ideas for Baby and Toddlers
Toys and Gifts for 1 Year Old Girls
Toys and Gifts for 1 Year Old Girls