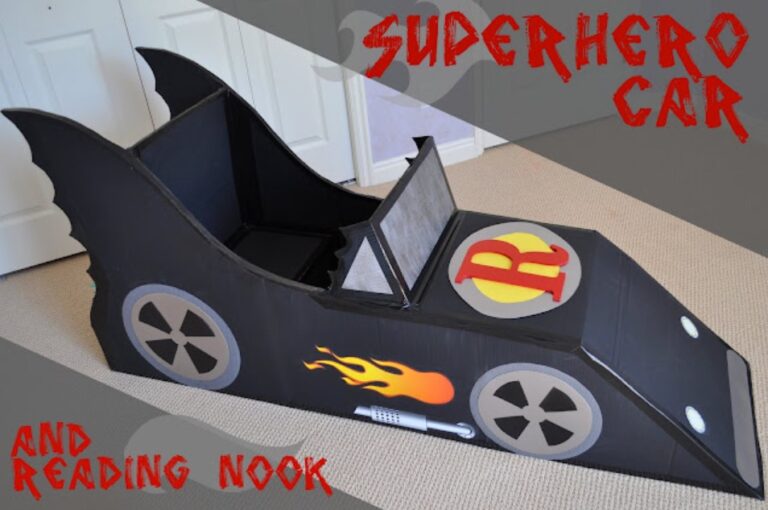
This was my final project for So You Think You’re Crafty. It was a lot of work, but I was really happy with the results.
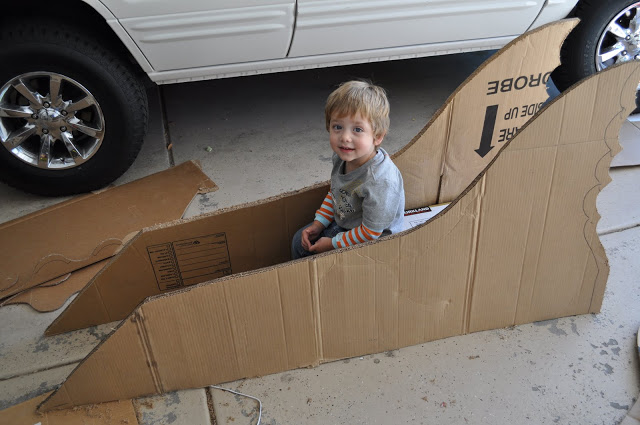
I’ve been planning on converting one of our bedrooms into a Superhero room for Rex. I wanted to create an area where he could read, but also have fun. The solution? The Superhero Car/Reading Nook.
While the car is huge and makes a big impact, the budget was very small. Lean in here and I’ll tell you what it’s made from… Cardboard! Recycled and cheap are both great things in my book. Don’t worry – it’s super strong and can be climbed on.
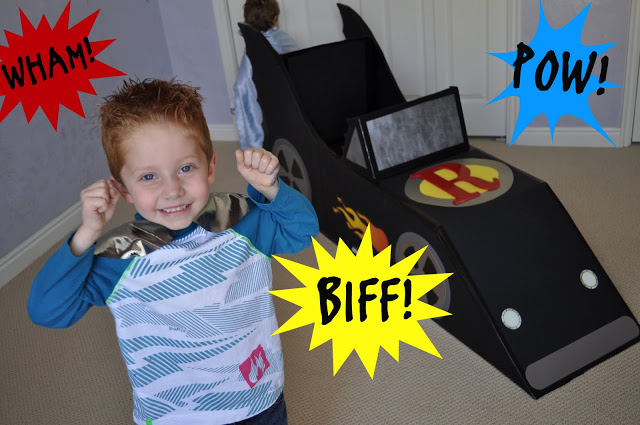
Right of the bat, you’ll notice it’s great for playing on.

However, it was also designed for reading. The back has a sturdy shelf to hold books and the seating area has a ledge for books to sit on.
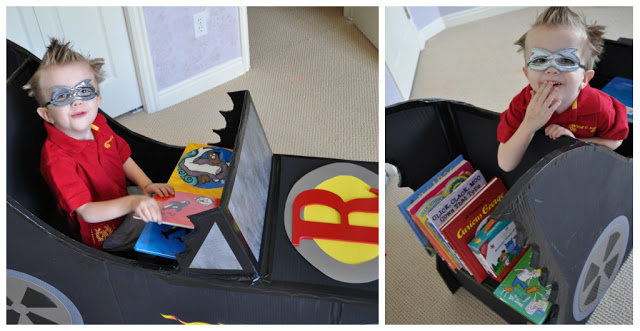
I think there will be a lot of adventures in it…
……and maybe even some surprise endings.
(The car was obviously modeled after the Batmobile, but when it comes to hair we prefer Wolverine’s.)
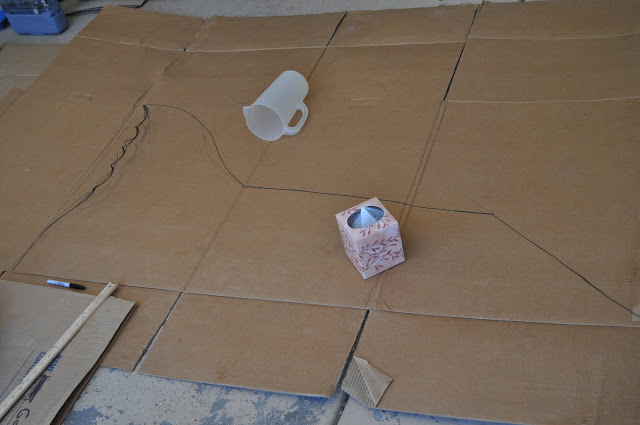
Holy inexpensive-recycled-cool-toy, Batman! Alright, let’s get started. You’re going to need about 10 boxes – the bigger the better. Open up about six of them to start and lay them out. Start by drawing the side of your car on the box.
Each side should be about 3 layers thick. You’ll want to stagger the bends in the boxes when layering. The best way to attach the boxes to each other is hot glue. You’ll want at least two people and two glue guns for this part.
Get as much glue out as you can, especially near the edges. (Since the shapes haven’t been cut out yet, it’s helpful to sketch the car shape onto the other layers or at least make some measurement marks so you’ll know where to put the glue.)
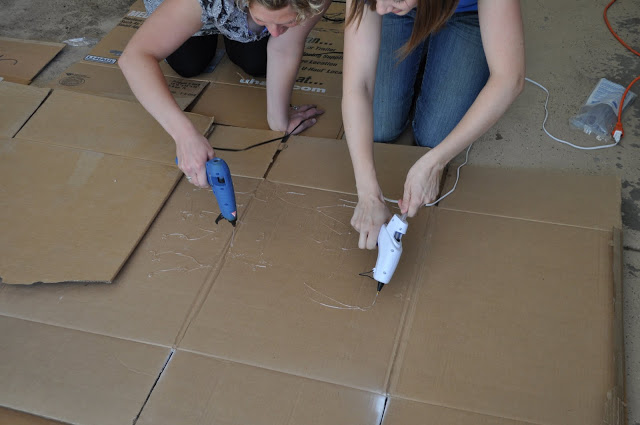
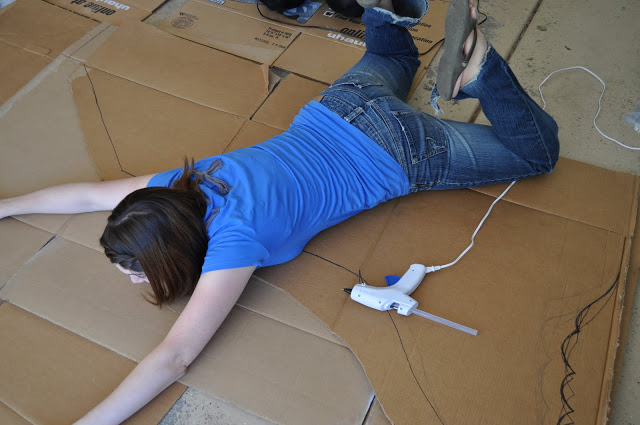
Once you’ve covered it with glue place the next layer on and press till it’s dry (as shown below :). After you’ve glued your three layers together it’s time to cut.
The benefit of waiting till they’re glued to cut them is that you can now use a jigsaw to cut them rather than cutting each layer with a razor blade. If you don’t have a saw then you can cut each layer out individually and then glue them together. That works fine, it’s just a little more work.
Do this all over again for the other side of the car.

If possible, use your best piece of cardboard for the outside. While the paint will cover graphics, you want to avoid spots where tape has torn off parts of the box and made the texture uneven.
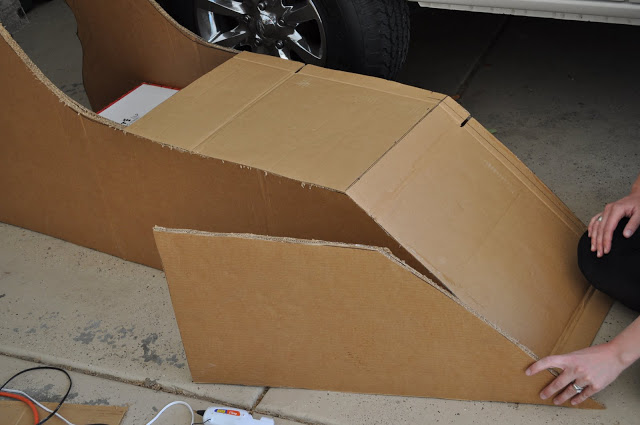
One way to make the next part a bit easier is to find two identical boxes that are a good width for the car. That way one can be the seat and you can use them both as a gauge to make sure you’re gluing the two sides perfectly parallel. Once you’ve placed (not glued) your boxes inside the car, measure the width and cut a long strip to run up the front of the car.
As you hold it up on the car park where the car bends and score (that means to cut, but not cut all the way through) the box so that it will lay flat up the front. I recommend two layers for the top. Glue them on one by one. Now cut a shape to match the front of the car and make it two layers thick (as shown). Glue this under the hood to act as a brace and support the top.
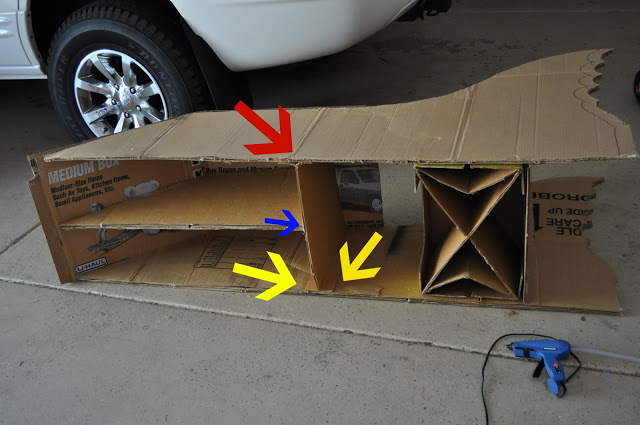
Time for more bracing. Measure the inside width of the car and cut two pieces to be 4 inches wider than that. These pieces will go where the red arrow is pointing, forming a “T’ with the other brace.
Score each piece two inches from the edge on both sides. This will serve as a tab and give you someplace to glue the brace better. See the tabs where the yellow arrows are? It’s two layers thick. One piece has tabs going towards the front and the other has tabs going towards the back. Be sure to glue where the pieces meet as well (where the blue arrow is pointing).
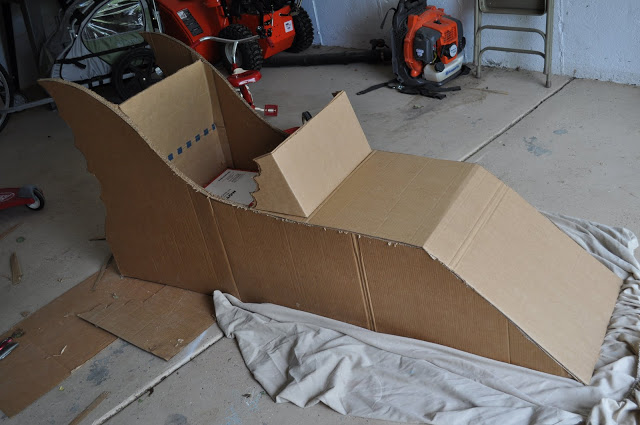
As you can see from the picture above, you’ll want to create some bracing within the seat itself. An “X” is very strong. I added some “V”s as well so that the box wouldn’t collapse when the boys jump on it. Glue in the braces and the box.
The back of the seat is much like the other brace. Cut a piece to span from the floor up to the top of the car and give it tabs to glue it in place. (The tabs won’t run the full length of the piece because the seat will get in the way. Just make them stretch from the top down to the seat.) Cut another piece with tabs to go behind it. Glue these pieces in.
Use the box that matches the seat for the bookshelf and reinforce it the same way you did with the seat. Glue it in place.
The windshield has two layers and the inside layer has tabs to secure it. The windshield is all one piece with the sides scored. It’s pretty much trial and error here. Draw it out, cut it, try it on, and make necessary adjustments until it looks right.
Now all the hard part is done! My favorite part is the decorating. Cover the whole thing with black acrylic paint. You can use a small roller to speed up the process. I used metallic silver paint for the windshield.
Now to clean up all the lines you can buy a roll of black duct tape, which can be found at the Depot. Run the tape along all the seams. Where there are curves you’ll have to make slits along the way just like you would when sewing. Later you can cover the slits with another layer of tape (as shown at the back of the car where there are waves.)
The tape will give the car a cleaner look and strengthen all your seams.

For the rest of the decorating, you can do whatever you like, but I’ll share what I did with you to give you some ideas.
For the tires, I cut circles out of the textured, rubbery stuff they sell to line your cupboards. It was a translucent gray and gave the car some texture. I found it at Ikea. For the rims, I bought a sheet of silver tagboard at Hobby Lobby and cut circles out. I cut out the black shapes to go over the top of the rims for more detail.
Lastly, I cut a bumper out of the silver tagboard and a big oval for the emblem on the hood. I put colored paper behind the oval and painted a thin wooden letter from a craft store to stand for “Rex.” When applying the tires, bumper, and emblem, spray adhesive worked extremely well.
It was a big project, but the results are also big. I can’t wait to do the rest of the room now!
I think you could build a lot of different types of cars that would also work. If you make this you HAVE TO show me. I would be absolutely thrilled to see it. Let me know if you have any questions.