1) THANK YOU to all of you who participated in last week’s Wake Up Wednesday challenge. Reading all your Valentine experiences yesterday made me so happy and excited! You guys rock!
2) I recently COMPLETED the tutorial tab above! Yay! You can now find a little picture of pretty much every tutorial on the blog. It took a long time, but it’s done. Check it out!
So, I’m currently converting our office to my craft room. One of you asked about that and recalled that I had a craft room in the basement. True. Here’s the explanation. We never used our dining room, so I sold out the table and moved our piano there, freeing up the office for my own use. Why bother? Because crafting in the basement has its limitations. It’s freezing. There are lots of spiders (especially in all my bins).
When I start a project someone who’s supposed to be napping always needs my immediate attention and I climb up two flights of stairs about 50 times before accomplishing anything. So, using the office will be awesome. However, I have vowed to keep it clean AND I’m trying to make it look really pretty since the area is much more visible than the basement was.
Okay, now that I’ve explained that you’ll see some fun upcoming projects in the office/craft area and the used-to-be dining room. We bought an inexpensive recliner for the office. We bought it so my husband could sit in it while I blog in the evening. It’s kind of fun. I purchased these really old nesting tables that I saw in the classified section to go next to the chair. This is what they looked like before…..
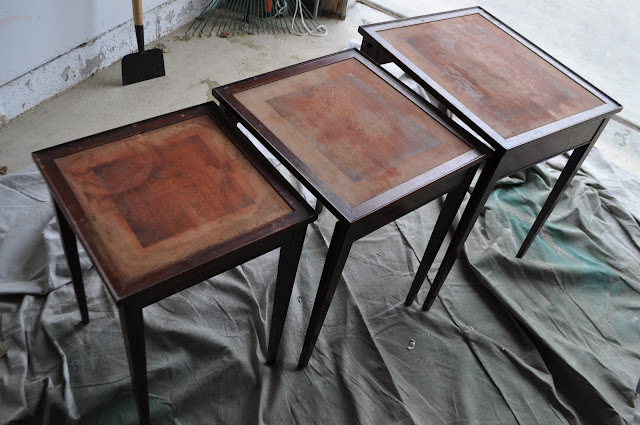
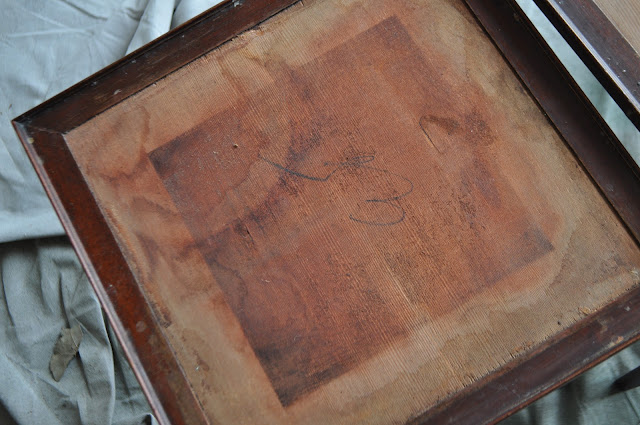
They were pretty beat up and stained.
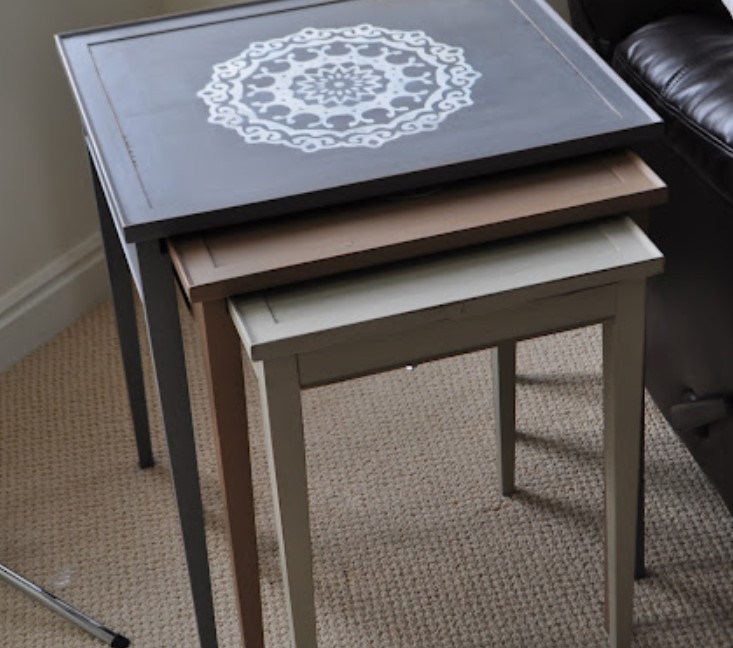
Here’s what they look like now.
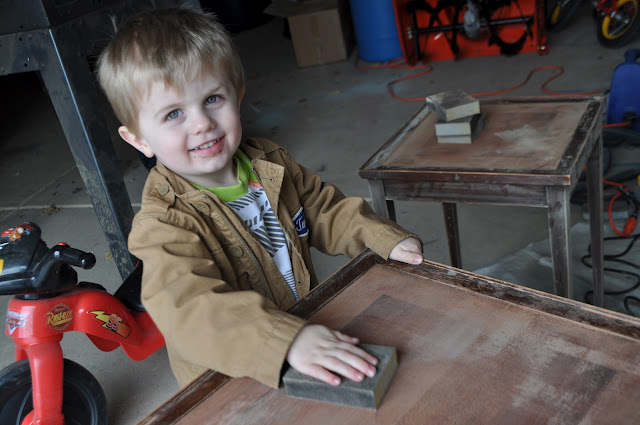
And here’s how it went down. I sanded them all down – partially with an electric sander and partially with a sanding block. (There were parts I couldn’t get with the electric sander.) I had a little help from this cute guy.
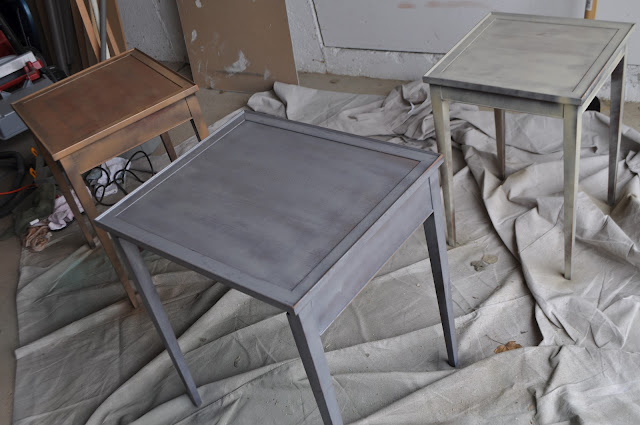
I wiped them down well and then spray painted them with about 4-5 really thin coats. (The picture is after two coats.)
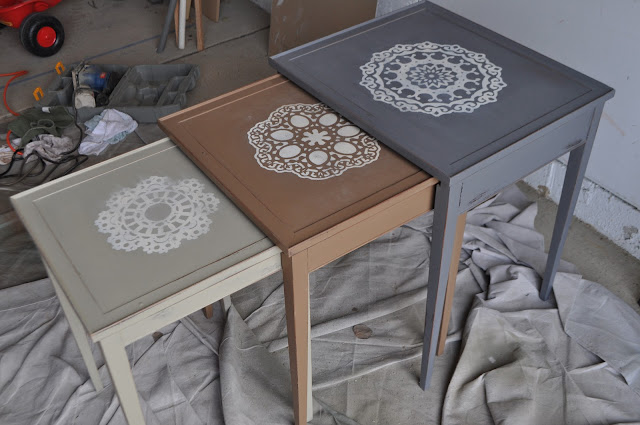
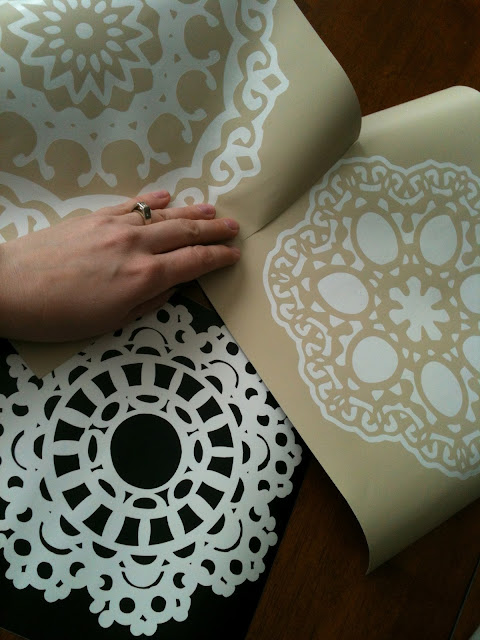
Then I used my Silhouette to cut three doily shapes out of vinyl. I purchased the shapes in the online store. They vary in size according to the table they are on. The color of the vinyl didn’t matter, since I was using it as a stencil. I weeded out the negative space.
Then I applied transfer tape to get the stencil on the tables. (If you’re not sure how to use transfer tape you can watch my how-to video on it HERE. It’s the second video in the post.)
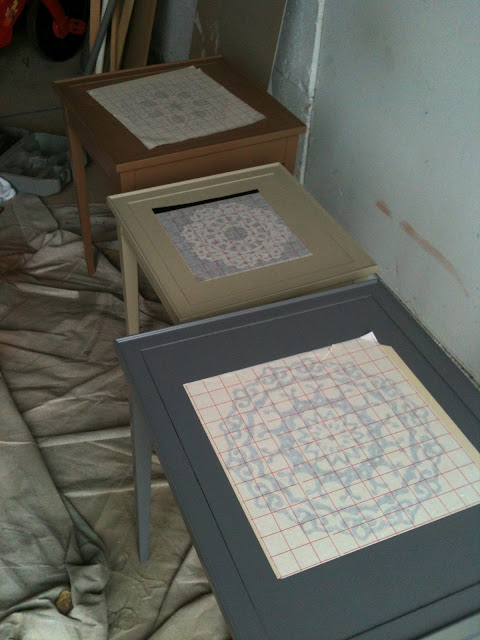
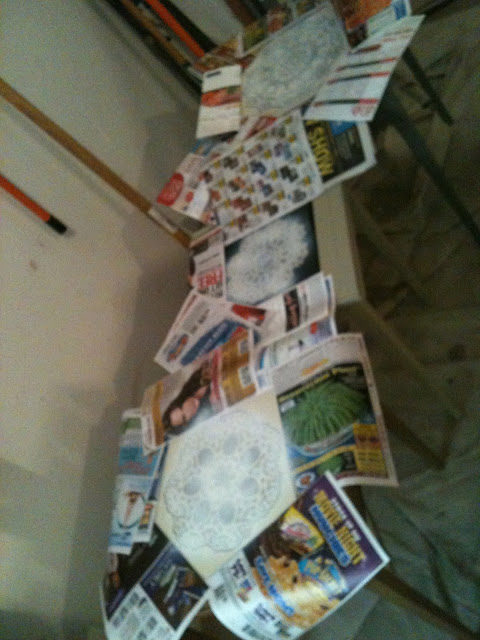
I covered the edges with newspapers and spray painted the doily part. I did about 4 really thin coats. (Yeah, this picture is horrid, but you get the idea.)
Now I’d love to say that I peeled off the stencil and it looked perfect, but it didn’t. The lines bled a little in spaces, so I decided to go the shabby-chic route instead. I sanded the edges of the tables and distressed the doilies a bit as well.
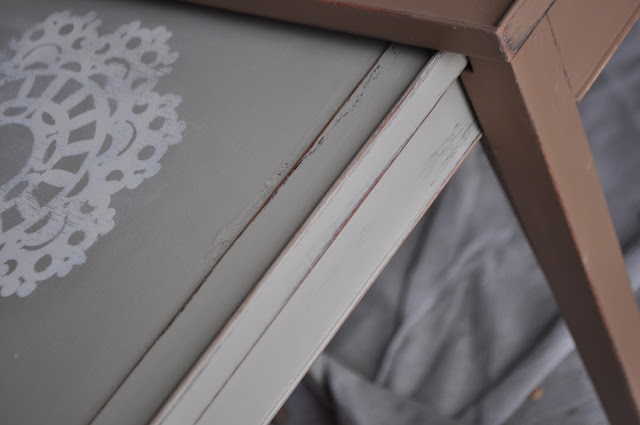
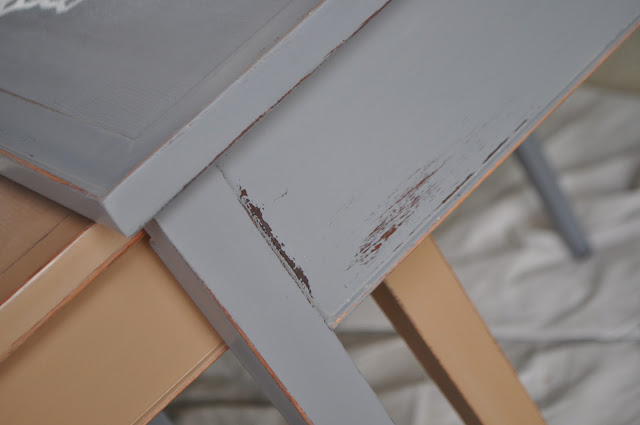
Then I rubbed on the same Paste Finishing Wax I used HERE for the final coat.
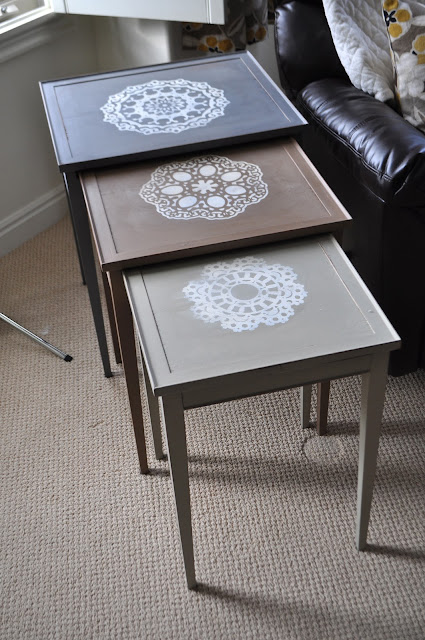
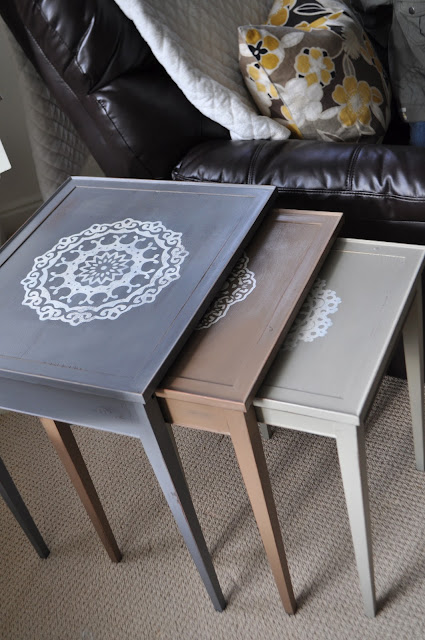
I think it’s so fun to make something old feel new again. I’ve never had nesting tables before. I tried to keep them really neutral colors so that I could move them to a different room if I ever need to.
That’s all for today. See you tomorrow. Thanks for stopping by.